Showing posts with label Gardening Tips. Show all posts

Tuesday, July 10

Drying and Saving Herbs, Part 1

In between trips to Michigan, I tend to my 5,000 square foot garden.  It's one of my passions, and lately, a huge stress reliever.  I returned home last week to a garden bursting with fresh herbs; a nice surprise, to be sure!  The herbs have been doing well so far this year.  It's been great!  It's funny, though, I rarely think to go out to the garden and get fresh herbs for cooking.  I'd love to use fresh basil in Italian dishes, if only I could eat Italian food!  I'd make myself a tomato, basil, and mozzarella pizza...add fresh basil to chicken pasta...throw basil into spaghetti sauce...but alas, it's not to be right now.  I'm focusing on the next best thing, though: drying fresh herbs!  Think about how often you use oregano, thyme, sage, parsley, et cetera for your cooking every day.  Now, think of how awesome it would be to have a whole jar full whenever you need it, and think of how great it would be to know exactly where those dried herbs came from.  If I can do this, YOU can do this!  It's so easy.  I'll show you just how easy it is!  Follow me!

So, here's what you'll need:

Twine
Sharp scissors (these are the special herb-cutting scissors I use, click here for a link, and no, I don't get any money for the link)
Herbs cut from your garden or patio pots
Ornament hooks or clothes pins

First things first: cut your herbs.  Try to do it when there isn't much dew on the plants.

Next, bring them inside.  Here I have three kinds of herbs: flat-leaf parsley, oregano, and basil.
Freshly cut from the garden.

Work with one type of herb at a time.  Check each stem for bugs.  Trust me.  I found a snail and a green worm in my herbs.  Remove said bugs by whatever means pleases you.

Arrange in bundles of about the same length.  Rinse with water to remove dirt.  Place on a cloth or paper towel in a single layer and pat dry as best you can.
Oregano--these were really tall, so I cut them in half before washing and bundling them.

Pat excess water with towels, as best you can.  They won't be completely dry.
Bundle and tie with a long piece of twine.  Be sure to tie tightly, because as the herbs dry, they will shrink.  Do not bundle too many sprigs together--it'll take longer to dry out if the bundle is too large.  Tie a hanging loop on one end of the twine.

Lather, rinse, repeat (metaphorically speaking), until all herbs have been washed, patted dry, and tied together.


All tied up and ready to be dried
Find a good place to hang your herbs.  I hang mine in the basement on the same shelves that I use to start my seedlings, near a dehumidifier, but you could hang them in a barn or garage, someplace airy but not too dusty. Hang them with plenty of space for air to circulate around them and allow them to dry.


Leave them be for a month or two.  No need to do anything to them.  I've seen that there are some people who have success drying herbs in their ovens, but I haven't tried that...yet.

Once they are dry, you'll crush them.  We'll cover that in part 2...click here!

Tuesday, June 19

It's Been a While!

Wow, where to start?  I've been off of here for quite a while.  So much has happened.  Things that I want to talk about, and things that I don't want to talk about.  I've lost a parent, quit my job, my health issues have gotten worse, and my dog has a rare disease.  I've started my garden again this year, started and transplanted my seedlings, and continue to work on finishing a room in the basement that I'm confident will, one day, be a studio/craft room.  I'm working on opening a new shop on Etsy, but in light of all that's been going on, it's on the back burner right now. 

Herb bed on the left, asparagus bed on the right
My main goal with the garden this year is preservation!  My garden last year was experimental.  I tried several types of plants to see what grew well and what struggled.  Here in northwest Ohio, we have very clay-ey soil.  I wanted to know what could grow without amending the soil at all--it was once farmland--and I learned a lot.  I learned that tomatoes and green beans grow well here (but I believe they grow well anywhere!).  I learned that growing a sweet corn variety next to an Indian corn variety will result in cross-pollination and some seriously unappetizing corn.  Haha, once my hubby found out how I planted the corn, he found it hilarious, because he would have told me not to do it!  I learned that there was no need for more than one plant each of zucchini, yellow squash, and winter squashes, although my abundance of winter squash kept very well in the basement for most of the winter.  I learned that potato plants should be planted in a different area of the garden on account of how wet certain areas of the garden become after heavy rains.  I had great success with carrots last year!  A five-gallon pail was overflowing with the harvest.  I processed and froze them in slices. 
A rainbow of carrot varieties

Sugar Baby Watermelon
Melons seemed to like the growing environment, and I ate some of the sweetest cantaloupe I've ever had from the garden.  I learned that garlic just doesn't like my soil.  Vidalia onions seemed to do well, even though I don't like to eat onions.  Home-grown strawberries are delicious, but hard to maintain and keep de-weeded, and when it's time to replant the patch, there will be a raised bed with weed block underneath.  I started an herb garden directly in the soil last year, but moved everything to a raised bed after the herbs struggled to get established in the clay.  I've tried to start a lavender patch, and some lavender came back and some didn't.  This year, we started an asparagus patch that should yield a harvest, even if only a light harvest, next year.  I dried and preserved herbs at the end of last year, and plan to dry and preserve much more this year (more about that in another post).  I dealt with insect issues and other plant diseases.  I fought a losing battle with weeds that continues this year.  So I say all of that to say that this year, I've planted an abundance of tomatoes, herbs, green beans, potatoes, corn, and melons, with the plan of preserving as much as I can this summer and fall.
Strawberry, before the weeds invaded
Herbs drying on a rack in the basement


I love the education that this garden has provided.  Having a large garden space has been a dream of mine for years.  Thankfully now, I have it and can continue to learn.  And maybe even pass a few tips along to others who read this! :)

Sunday, May 5

Tomato Seedling Surgery 2.0--Learn From My Mistakes

Now He who supplies seed to the sower and bread for food will supply and multiply your seed for sowing and increase the harvest of your righteousness; you will be enriched in everything for all liberality, which through us is producing thanksgiving to God.--2 Cor. 9:10-11

This is an update from the first time I tried to separate tomato seedlings, the post for which you can read by clicking on this link: Tomato Seedling Surgery .  While I was on the right track when I did the original transplanting, I did it at the wrong time, which I have since learned.  When only one of those tomato plants survived the original repotting, but then miraculously had four more plants randomly pop up in that same transplanted pot, I felt that God was giving my naive gardening skills a second chance.  When I saw the little sprouts pop up and start growing, and then thriving, my hope was renewed and I knew I could do the transplanting this time, and it would work!  Yesterday was the day.  I did everything basically the same as I did the first time, only the lesson here is this:

DO NOT SEPARATE TOMATO SEEDLINGS UNTIL THE STEM IS IS STRONG AND HAS THE LITTLE HAIRS ON IT, AND DO NOT SEPARATE THE TOMATO PLANTS UNTIL IT HAS AT LEAST FOUR LEAVES ON EACH PLANT. 

When I transplanted the seedlings before, they were just too young and fragile to be split up, and the trauma of the whole situation was more than they could handle.  This time, all five of the plants growing in the pot had a thicker stem, many leaves, and stronger roots. 
This photo is actually a bit outdated...the seedlings have grown considerably in the week or two that has passed since this photo was taken.  The fact that they were outgrowing their pot was the motivation for me to take this task on once again.  Here's what I did:

With a spoon, I gently scooped out the largest plant.  When I did, the other plants were loosened and came up with the main plant.  Veeeery gently, I separated all of the plants, and scooped a fairly deep hole in the empty transplant pots.  I buried the plants deeper in their new pots, to give the plant more stability.  With tomatoes, the little hairs on the stems are actually roots, so you can plant them deeper and not worry.  I added potting mix and watered them thoroughly, and it worked!  So I am happy to report that as of this moment, I think I'll have five tomato plants for the garden this year.  This will make the hubby happy, and when the hubby's happy, I'm happy.  So now you know that it's possible to transplant and separate seedlings when more than one seed grows in the pod, and you also know how long to wait before trying to separate them.  Learn from my mistakes!  It's why I share them with others.
Five tomato plants.  I had a sixth pot ready,  but didn't use it.  Now it's just there for visual balance, because I'm weird.


Monday, April 29

Gardening and Spring Fever

How is your garden doing so far?  I know it's early, but I've planted a few things, and they are coming up!  I planted nine potato plants (I think), and I'm seeing some sprouts, and my radishes are thriving.  I planted lettuce this past weekend, and transplanted the broccoli plants I purchased at the local greenhouse.  And the strangest thing has happened with my one lonely tomato plant: somehow, four more have sprouted in the same pot!  I have no idea how it happened, but maybe I'll have more than one tomato after all!  Time will tell.  I am calling it a tomato miracle.  I'll take whatever I can get!
Fresh garden beds.  I'm using stones to separate the spaces in the garden beds (just for my reference).  Top to bottom: four broccoli, three rows of radishes, and a freshly planted lettuce bed.  Potatoes on the right.
The miracle tomato pot.  Five plants.  How...??

Potato plants just beginning to poke through the dirt.
The lone asparagus!
I think we have a pair of nesting cardinals somewhere in our property.  I've seen this guy out and about a lot lately, and the female is usually somewhere nearby.  I have yet to locate the nest, although I'm really not looking for it.  I will leave it be.  But it's such a treat to see the bright red contrasted against the lush green grass when I catch him poking around the yard.  Check him out!
"Hmmm, which blade of grass will be tasty?"
"This one looks delicious!"

Well, as of right now, the doctor doesn't think that I am gluten intolerant.  Removing gluten from my diet didn't make much difference in the symptoms, and the celiac blood test came back normal.  They still have no idea what may be going on, though.  I'm slowly adding wheat-based products back to my diet.  I can't say that I've noticed any difference my overall health by avoiding gluten-based products, and I don't believe that it's a good idea for a body's health to cut out an entire food group from the diet, but I am going to try and cut back a bit.  Hopefully I'll find out some more answers when I go back to the doctor this week: they did an abdominal ultrasound on Friday, and I'll get the results.  I don't anticipate them finding any issues in the results, though.  Time will tell.

Tuesday, March 5

Tomato Time!


"Then God said, “Behold, I have given you every plant yielding seed that is on the surface of all the earth, and every tree which has fruit yielding seed; it shall be food for you; and to every beast of the earth and to every bird of the sky and to every thing that moves on the earth which has life, I have given every green plant for food”; and it was so." --Genesis 1:29-30

Well, it's finally that time of year...time to start the tomato plants!  I'm in Zone 5, so tomato planting usually happens in the last half of May.  Starting them now will give them plenty of room to grow and strengthen before I start acclimating them to the outdoors.  Last year, I kept seeds from an heirloom cherry plant that I purchased at a local greenhouse with the intention of growing them into new plants this year.  My husband loved these cherry tomatoes, so I kept as many seeds as I could.  From what I have heard and read, you really only want to keep seeds from heirloom plants, because if you go to the grocery store and save the seeds from, say, a regular green pepper, and then attempt to grow a new plant from those seeds, you really won't know what might come up.  The fruits and veggies at the grocery store are most likely genetically modified in some way, and also likely a hybrid of other plants, and therefore can't be expected to grow like a normal plant in normal conditions and normal soil.  If you purchase seeds to start your own plants, and want to reuse the seeds again next year, be sure to purchase heirloom seeds or plants, as these are most likely to be untouched by modern science and fairly reliable in growth and yield each year. 

Last fall, I separated the tomato seeds from the slimy goo inside of the tomatoes and rinsed them well (by the way, I'm not a fan of eating tomatoes raw.  I'm slooowly coming around to eating chunks of tomato in food dishes.  I do, however, love tomato-based foods like ketchup and salsa!  Weird, huh?).  Then I let them air dry on the counter for several days, placed them in a resealable baggie, and stuck them in the freezer for the winter.  Now they are in their new home of warm moist dirt, near a heating register and in the sunniest window we have.  Here come the tomatoes!  I'd love to invest in a heating pad for the seeds, but we just don't have room for a little greenhouse rack right now.  I have successfully started plants like this before, though, so I'm not too concerned.  Depending on how many come up, some might even be headed to new homes in the months ahead.


It's pretty inexpensive to start seeds--much cheaper than going to the greenhouse and purchasing the plants that you want to grow.  It depends on how much you want to grow, but you might spend a total of $5-$10 to start seeds, whereas if you purchase the plants from a greenhouse, you'll spend at least twice that amount.  Granted, the work's been done for you, so to speak, and all you have to do is plant them, but starting from seeds is more fun, less expensive, and much more satisfying!  I'm only starting tomatoes inside, so I decided to make my own little greenhouse out of some old carry-out boxes that I kept specifically for that purpose.  It's much smaller and space-friendly than the larger greenhouse boxes that I have previously purchased and used.  I used peat pellets that I had on hand to start the little seeds, then I added some starter soil that I bought on clearance last fall for when they need more soil to keep growing.  Fall is a great time to stock up on clearanced items that you can use in the spring for your new planting season.
I'm going to try and get nine plants from the seeds I saved.
I have three seeds in each peat pod.  You can see them here before I covered them lightly with the dirt.
The carry-out box with the warm, wet pods inside.  You can see the condensation on the inside.  I only snapped one side closed, to allow for slight air circulation.  I'll mist the plants every day or two to keep them wet.
Here's an update on my homemade vanilla extract.  You can see how dark and rich-looking it is now.  It's been three weeks since I submerged the beans in the alcohol, and the scent is intoxicating!  A strong, rich, sweet, yet alcoholic smell that will continue to steep for another five weeks before I taste it, but I'm already very excited.  Oh, the cookies I will make!  If you didn't see the original post with instructions on how I am making my extract, click here: Makin' Homemade Vanilla Extract.

Sunday, September 2

Business Cards, Garden Goodies, and New Countertops!


Happy Labor Day weekend!  We are having a good, relaxing weekend.  Hopefully you are too!  We took the opportunity yesterday to go to Toledo to do some shopping and eating.  I wish there was more to do in our town...we get pretty bored here some times, and have to get out and go elsewhere to find things that we need.  We also have a limited restaurant selection here, so we enjoy getting to go places that have more options.  I believe that we are both spoiled by our experiences living elsewhere, so we kind of miss having the choices that we used to have.  But we survive. 

I had to share these: Mini Moo Cards--these are little business/calling cards, that are the length of a regular business card, but half the width.  Moo (the printing company) was offering one hundred free mini card to Etsy sellers (just had to pay $5.00 for shipping) and they printed whatever you wanted on the cards.  And they printed both sides, which is usually an extra charge, so it was a nice bonus.  I had been wanting to order some business cards lately, to include in packages when someone buys something, but couldn't justify the cost, so this deal was perfect (and they gave me a discount code to share, so if you need cards, send me a message and I'll send you the code).  I would certainly recommend them--they were really easy to create, and they got to me quickly!
My cards came in a little box that can be used to keep others' cards in it, too!
A set of my cards.  I was able to select whatever image I wanted for the back, and then create a simple card on the front of each one.  So cool!

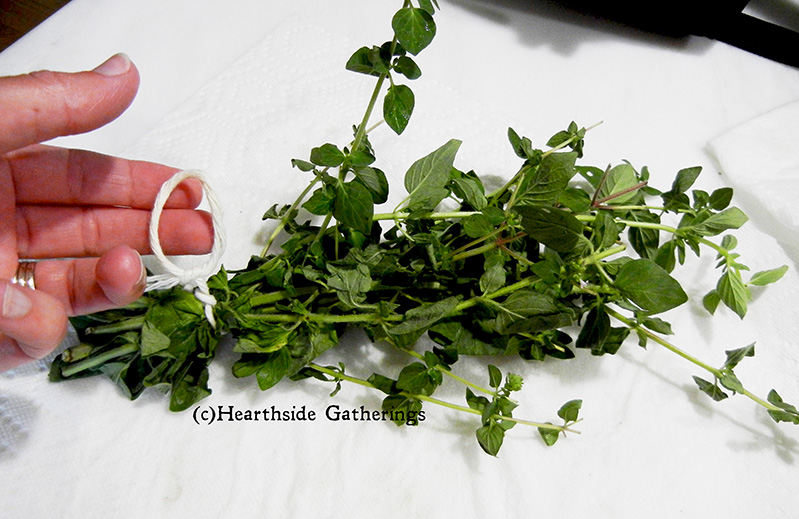
On the garden front, I am actually getting a few cucumbers.  Nothing major, but considering I thought the garden was beyond saving for the year, it's a small victory.  Here is a picture of my first cucumber from the garden:
Haven't eaten him yet--he's too cute.  I think I shall call him Stub.
 I was also surprised last week, while I was examining my vegetables, to find that I had two more small pumpkins beginning to grow!  I have decided that I can't stand the thought of the mystery creature getting these, so I went out and bought a bottle of Liquid Fence deer and animal repellent and sprayed my whole garden and garden perimeter.  It's food safe, as long as it's not applied right before harvesting.  That stuff smells awful!  But, hopefully it will be successful at repelling critters around my garden.  Not only does it have rotten eggs in the ingredients, but it also has cayenne pepper juice as well.  It works on the odor/taste repellent idea--if it smells bad, and it tastes bad, the animals will leave it alone.  I will have to let you know how it works.  I know I found it particularly repelling!

We took some time today to attempt to replace the two smaller pieces of countertop, and I'm glad to say we were successful!  It was easier than either one of us expected, and now we know what to expect for the long piece that my mother and stepfather will come down and help us replace next weekend.  We are so excited, now that we see what the smaller pieces look like on the counters!  (Insert big cheer sound here.)  I'll show you what we did, in case you decide to take on this project yourself.

First step: Assemble the necessary tools for the job.  For this, we needed a power drill, Philips head bit, a square bit (which we found out later), a utility knife, a putty knife, a dime, a penny, a used Cincinnati Reds ticket stub, and of course, a sandwich and drink from Jimmy John's (the sandwich had been eaten by photo time).  Now, if you don't have all of those items, the first five items will suffice.
Second Step: Determine how your countertops are attached to the base cabinets.  We removed all sliding drawers and took out some cabinet items to make room.  We found that there were screws holding our countertops in place.
Step Three: Remove all of the screws and KEEP THOSE SCREWS.  This is very important.
In case you're wondering, that's my hand.  Yes, I worked the screwdriver.  Like a boss.
Step Four: Using the utility knife, cut through the existing caulk along the backsplash edge.  You can also use a putty knife to scrape it off.  It will take at least a couple of passes with either tool.
Step Five: Lift the old countertops off and set them aside (they should just come off, but if someone glued the backsplash to the wall, you'll need to pry it off with a putty knife).  We plan on giving our old countertops to ReStore.  Set your new pieces on the cabinets to encourage yourself.
Step Six: Wonder why the countertop edges don't line up with the screw holes.  Huh.

Step Seven: Wonder what these pieces of wood are that are the same size as the depth of the countertops. Consult the instructions that give no indication of what to do.

Step Eight: Put two and two together and figure it out on your own.
Attaching wood strips to the bottom of the counter.  Why not just make them like this to begin with?
Step Nine: Once the wood strips are attached, put the countertops on the cabinets.  Use the old screws from the old countertop that I told you to keep.  Screw the countertops to the cabinets using the existing holes.  Sorry, too busy working.  No picture of this step.  Just imagine the picture from step three going backwards.

Step Ten: Use the caulk included in the Installation Kit and caulk the backsplash. 
Step Eleven: Smooth out the caulk and let it dry.  That's it!  You're done!

Well, maybe not completely done.  First, we still need to paint over the caulk and touch it up.  Second, we still have the long piece to install, but like I said earlier, that won't happen until next week.  

Let's compare!  
Countertops before
Countertops after
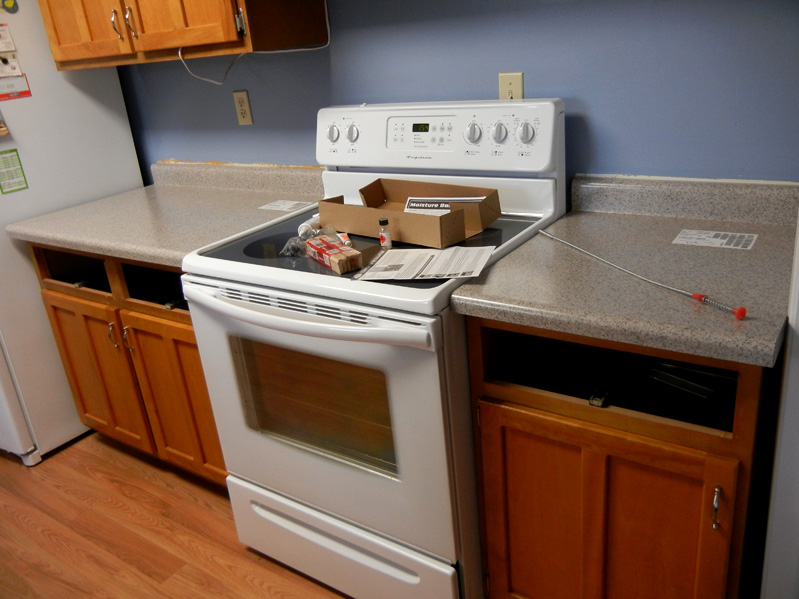
We are very happy with our new counters!  Just one more picture, that I found funny when we pulled out the stove:
We enjoyed the random napkin that had been hanging on to one of the vents for who knows how long.
Ta-Da!  Have a great weekend!

Thursday, June 21

Life Happens

My Husband's Birthday
This week, we celebrated my husband's 30th birthday.  Hard to believe he's finally joining me in the thirties!  We went out to dinner at our favorite restaurant to celebrate, and I got some balloons, a bag of Cool Ranch Doritos, and a can of Pibb for decoration.  If you knew my husband, you would understand the Doritos and Pibb, so for those who don't: the Doritos are in honor of sticking to good eating habits for six months now, and the Pibb is in celebration of his vow to not drink any Pibb (his favorite pop) from the beginning of the year to his birthday--six and a half months, a big commitment for him.  He got to enjoy some old favorites on his birthday!   We were up to visit my family over the weekend, and while we were up there, we celebrated his birthday with a golf-themed ice cream cake from Baskin Robbins.  We had a few days of birthday celebration for him, but he left for a business trip the day after his birthday.  :(

An Owl for My Sister:


Crescent Roll Pockets
So, at work today, I was trying to figure out what I was going to do with the half of the can of crescent rolls that I would have left over after I made a pot pie for dinner.  Then I had an idea.  I decided to try making them into chocolate-stuffed and cinnamon-sugar-stuffed pockets!  Below are the steps and recipe for the creation I call "Crescent Roll Pockets":
First, create four rectangles from pinching the seams together of each set of triangles, like in the picture above.
Pat the rectangle out and make it more uniform in shape, if necessary.  For the picture above, I sprinkled about a teaspoon of cinnamon on the dough, then roughly 1-2 tablespoons of semi-sweet chocolate chips.


For this crescent pocket, I decided to try and make it cinnamon-sugary.  I spread butter over the dough, then mixed 1/2 tablespoon of cinnamon and 1 tablespoon of lightly-packed brown sugar in a bowl, then spread it over the butter.  You can certainly experiment and create whatever flavors you want!  Just be sure to leave an edge around the dough for sealing.


To fold the dough, follow the steps in the pictures above, and when you've folded all of the sides in, pinch the seams together on the top to seal and keep the stuffings in.  Bake them in a preheated 375 degree oven for about 15 minutes or until they are golden brown, then remove them from the oven and let them cool for about 10 minutes.
 While the pastries are cooling, make the glaze: 1/4 to 1/2 cup of powdered sugar, 1 to 2 tablespoons of milk, and about 1/4 teaspoon of vanilla extract.  Mix all together in a small bowl, adding milk a little at a time until you get your desired consistency for the glaze.
When the pockets are cooled, drizzle the glaze over the top.  Then, grab a fork and enjoy!  You're welcome.

A Loss in the Family
I mentioned earlier that we were up to visit with family over the past weekend.  The reason was because my uncle, my mother's brother, passed away from an illness.  It was a sad time, for obvious reasons.  He was always a good uncle to us, and he was always nice to us.  I have many good memories of him, and he was a neat man.  He liked to dabble in all sorts of hobbies: he tried growing crops, he did canning, he created barbecue sauce, he brewed his own raspberry wine, he restored antique telephones, he sold Christmas trees, and just generally seemed to enjoy life.  He seemed to succeed in anything he tried to do!  He even gave us one of his phones a few years ago, and it's been a prized possession of ours ever since.  Now, it's something that will always remind us of him every time we see it hanging on the wall in the kitchen. My husband didn't know him extremely well, but he always enjoyed the times that we were able to visit with my uncle.  Please pray for my uncle's children, grandchildren, my mom, and my mom's other brother, who are still grieving, but are glad for the time they were able to spend with him on earth.

Sad Garden
Sad, sad, sad.  It's certainly struggling under the severe conditions that seem to have settled over this part of the country.  While I water whenever I can, it doesn't seem to help that much.  There's such a difference in the plants when it rains, as opposed to a good soaking from the hose.  Though I would love to have a rain barrel, and not have to use chemically-treated city water in the garden, a rain barrel does no good if there has been no rain!  Everything is still alive, but it seems that the hot sun beating down all day just makes them so droopy.  It's cloudy now, and there is rain in the area, so here's hoping for a good soaking from mother nature!
A blossom on my pumpkin plant

My heirloom chocolate cherry tomato plant--hoping to keep some of the seeds and do it again next year

Rain's a-comin'!
I feel like some days are a real struggle.  Life is hard, even though we have all of these incredible conveniences today.  The world is not a friendly or nice place, so we take comfort and refuge with family and friends that we love.  And that's not a bad thing; we are meant to have relationships with the people around us.  But are we building the kind of relationship that we need to have with the One who created us?  He loves us more than we can imagine!  He will give us strength to endure each day, each hour, each trying minute of our lives.  The trials and grief, along with the joys of life, all work to mold us into the person that He wants us to become.  "Therefore we do not lose heart, but though our outer man is decaying, yet our inner man is being renewed day by day. For momentary, light affliction is producing for us an eternal weight of glory far beyond all comparison, while we look not at the things which are seen, but at the things which are not seen; for the things which are seen are temporal, but the things which are not seen are eternal." 2 Corinthians 4:16-18.

ShareThis