Showing posts with label Kitchen remodeling. Show all posts

Thursday, September 13

The Kitchen...It's A Wrap!--Trying to Decorate, and a New Owl Corner


My Kitchen!
We finally finished!  We have a whole matching kitchen again.  My mom and stepdad kindly came down Friday afternoon and helped us with the installation and plumbing, and we were so grateful.  For the most part, things went as they should, and it took the majority of last Saturday.  We had a good time, though, and I think they did, too.  We made the pulled pork that I've mentioned many times before, and it cooked slowly the whole time we worked.  We were all pretty hungry by the end!  We enjoyed a delicious meal of pulled pork sandwiches, baked beans and green beans, with cupcakes for dessert.  I love my "new" kitchen now, and am more eager than ever to begin changing out the carpet in the living room and hallway for a nice wood laminate flooring and big area rug.  I believe that will complete all of the cosmetic changes we plan to make on the house before we consider putting it up for sale.  At least we'll be able to enjoy the changes we've made until then!  Here are some pictures for your enjoyment:
Deh-cor-ay-shee-uns
I am itching to decorate.  However, I've also had a ton of crafty ideas lately, and can't seem to find the time to do all I want to do while working during the day, taking care of dinner, dishes, laundry, and all of the other housework things that also need to be done.  I'm making more pumpkins (to decorate with, as well as sell), I purchased fabric for a mantle cover (which will look nothing like what I designed--I've decided that there is just not time to create the masterpiece I had in mind before Christmas comes and goes), various house decorations, and some awesome glittery wall decor, which will be a DIY tutorial on here in the very near future.  I seem to get a lot of ideas when I have the least amount of time to complete them, and then I get frustrated and feel like I never get a chance to do things I want to do, because I don't have the energy in the evenings to work on things I want to make.  Does that even make sense?  I have all of this ambition in the morning and early afternoon, and make all sorts of ambitious lists of things I want to accomplish, and then I get home and decide that I don't feel like making that delicious from-scratch pot pie, so we have fish sticks, and I don't feel like folding the laundry, so it stays in the dryer for days, and I would rather veg out on the couch instead of washing the dishes, at which point the pile of dirty dishes from dinner begins to resemble a stinky art sculpture in the sink.  At least my sink is deeper now, and can hold more dirty dishes.  But decorating must be done--it's something I look forward to doing every year, and something I hate to take down once the holidays are over.  It's really a vicious cycle.

Goodsmith's
Because I needed one more thing to do, I opened a shop on Goodsmith's.  Goodsmith's is a small, but unique, online shopping site, somewhat similar to Etsy, but still up-and-coming.  They have lower fees for selling, and listing is free.  I saw an ad in the Better Homes and Gardens Christmas Ideas magazine that I picked up at the store last weekend, so I'm hoping that others who buy the magazine will give it a look and maybe bring some new traffic and sales my way.  If you have time, check it out!  Let's support artists and crafters in the U.S. and stimulate the economy the way it's meant to be done--through we the consumers, not the government!

Owl Corner
Today we will learn about the Western Burrowing Owl.  He's cute!  These guys can be found throughout the western U.S., a little into Canada, and into Mexico.  They are also found in western Florida.  This is a small to medium-sized owl, usually standing just under a foot tall.  They are known for their long legs and brown color, and usually have light brown to cream colored spots on the upper parts of their bodies.  As their name indicates, they burrow in the ground to make their homes and nests.  They will either dig their own new hole, or they will use abandoned holes of ferrets, prairie dogs, and other underground rodents.  They feed on beetles, grasshoppers, mice, rats, small ground squirrels, and other small rodents, and will even eat fruits and seeds, unlike other owls.  They usually only have one mate throughout their lives, and can lay a clutch of anywhere from one to twelve eggs, and their average nest size is seven eggs.  These owls are considered to be threatened/endangered.
Photo from sdakotabirds.com, taken by Terry Sohl.  Information from Owling.com, The Owl Pages, and thebirdersreport.com.

Hubby was gone again this week for work.  I struggle so much with loneliness when he's gone, because we have no family and no real friends per se here.  I have to remind myself constantly that I'm not alone, even though I can't physically see my Friend.  So when you find yourself faced with a lonely time, whether it's an hour, a day, a week, or a lifetime, just remember that if you have put your faith in the Lord, He will never leave you, and you are never alone.  Psalm 34:17-19 says, "The righteous cry out, and the Lord hears them; he delivers them from all their troubles. The Lord is close to the brokenhearted and saves those who are crushed in spirit. The righteous person may have many troubles,but the Lord delivers him from them all", and Hebrews 13:5 says, "...because God has said, 'Never will I leave you; never will I forsake you'”.  Those promises provide comfort to those who are hurting and lonely.


Friday, September 7

Countertop Update, Milk Jug Vases and Monster Cookies

I'm very excited--we are finishing our countertops this weekend!  I'm looking forward to it.  I'll be sure to post pictures so you can see the finished product.

What have you been up to?  Even though the week was shorter than normal, it felt long.  Hubby and I both thought a normal week would have gone faster.  I seem to look forward to the weekend more and more, because that's the only time I have the energy to do things that I like to do.  Today I've been busy preparing for my mom and stepdad's arrival, baking, cleaning, grocery shopping, running errands, etc.  We will be having pulled pork this weekend, so I picked up a ten pound pork shoulder, so that we might have some left over for later.  It tastes and smells so good!  It's roasted in the oven, which is good, because we don't have a smoker.  If you'd like to see the recipe, click here: Spicy Dr. Pepper Pulled Pork .  I wish I could take credit for this recipe, but I can't.  The recipe comes from The Pioneer Woman, Ree Drummond.  She has some great recipes, and the kind of life I dream of having.

After more consideration, I think I'll give Blogger a stay of execution.  If you read this blog fairly regularly, you'll notice that I changed the look considerably, which makes me happier.  I am still in the "clean up-condense-get rid of-can't stand clutter" phase, which is a reason behind the change, but there were also some glitches with Blogger that gave me fits with pictures and such, and eliminating some of the blog elements takes care of that.  So, for now, I'll be sticking to Blogger.  I'm a woman, and I reserve the right to continue to change my mind as much as I want.

At the grocery store today, I found a bright cheerful bouquet of miniature Gerbera daisies.  I couldn't resist--I bought them.  This is why I keep buying little decorative bottles for around the house.  I love to use them for vases!  They have a kind of old-fashioned look.  Here are some pics for your enjoyment:
Old Borden's Milk Jug, Dark Sage Satin Ribbon, and Gerbera Daisies.  Simple, yet elegant and cheerful.
My little garage sale half-pint milk bottles, and daisies.  No other decoration is needed, in my opinion.  Set them on your counter...
Or put them on your windowsill for something cheerful while you wash dishes.
And finally, I experimented with a monster cookie recipe last weekend, and thought I'd share it with you.  I had a hard time even finding a recipe to begin with!  Are they just not popular anymore?  I finally found one in an Amish recipe book, and then I decided to alter it a bit.  I call these "Stick To Your Ribs Monster Cookies".

You'll need:
1/3 C butter or margarine, softened
1/3 C sugar
1/3 C brown sugar, lightly packed
1 large egg
1/4 tsp vanilla
1 tsp baking soda
1/2 tsp cinnamon

1/2 C peanut butter (crunchy or smooth)
1/4 C flour
1 C rolled oats
2/3 C chocolate chips
2/3 C M & Ms

What you do:
Preheat oven to 350 degrees.  Cream together your butter and sugars.  Add egg, vanilla, baking soda, cinnamon, and peanut butter, mixing well after each addition.  Add the flour, mix well, and scrape the sides of the bowl.  Then add the oats, mixing well and again scraping the sides of the bowl.  Add your chocolate chips and M & Ms, and mix in by hand.  Drop by rounded tablespoonful onto a baking sheet lined with parchment, and bake for 15 minutes, or until the edges begin to brown slightly.  Remove from the oven and let cool on the cookie sheet for another five minutes, then move to a cooling rack.  This recipe makes around 20 cookies.  Keep them in an airtight container, or wrap individually and freeze for later.  Good and filling!


Sunday, September 2

Business Cards, Garden Goodies, and New Countertops!


Happy Labor Day weekend!  We are having a good, relaxing weekend.  Hopefully you are too!  We took the opportunity yesterday to go to Toledo to do some shopping and eating.  I wish there was more to do in our town...we get pretty bored here some times, and have to get out and go elsewhere to find things that we need.  We also have a limited restaurant selection here, so we enjoy getting to go places that have more options.  I believe that we are both spoiled by our experiences living elsewhere, so we kind of miss having the choices that we used to have.  But we survive. 

I had to share these: Mini Moo Cards--these are little business/calling cards, that are the length of a regular business card, but half the width.  Moo (the printing company) was offering one hundred free mini card to Etsy sellers (just had to pay $5.00 for shipping) and they printed whatever you wanted on the cards.  And they printed both sides, which is usually an extra charge, so it was a nice bonus.  I had been wanting to order some business cards lately, to include in packages when someone buys something, but couldn't justify the cost, so this deal was perfect (and they gave me a discount code to share, so if you need cards, send me a message and I'll send you the code).  I would certainly recommend them--they were really easy to create, and they got to me quickly!
My cards came in a little box that can be used to keep others' cards in it, too!
A set of my cards.  I was able to select whatever image I wanted for the back, and then create a simple card on the front of each one.  So cool!

On the garden front, I am actually getting a few cucumbers.  Nothing major, but considering I thought the garden was beyond saving for the year, it's a small victory.  Here is a picture of my first cucumber from the garden:
Haven't eaten him yet--he's too cute.  I think I shall call him Stub.
 I was also surprised last week, while I was examining my vegetables, to find that I had two more small pumpkins beginning to grow!  I have decided that I can't stand the thought of the mystery creature getting these, so I went out and bought a bottle of Liquid Fence deer and animal repellent and sprayed my whole garden and garden perimeter.  It's food safe, as long as it's not applied right before harvesting.  That stuff smells awful!  But, hopefully it will be successful at repelling critters around my garden.  Not only does it have rotten eggs in the ingredients, but it also has cayenne pepper juice as well.  It works on the odor/taste repellent idea--if it smells bad, and it tastes bad, the animals will leave it alone.  I will have to let you know how it works.  I know I found it particularly repelling!

We took some time today to attempt to replace the two smaller pieces of countertop, and I'm glad to say we were successful!  It was easier than either one of us expected, and now we know what to expect for the long piece that my mother and stepfather will come down and help us replace next weekend.  We are so excited, now that we see what the smaller pieces look like on the counters!  (Insert big cheer sound here.)  I'll show you what we did, in case you decide to take on this project yourself.

First step: Assemble the necessary tools for the job.  For this, we needed a power drill, Philips head bit, a square bit (which we found out later), a utility knife, a putty knife, a dime, a penny, a used Cincinnati Reds ticket stub, and of course, a sandwich and drink from Jimmy John's (the sandwich had been eaten by photo time).  Now, if you don't have all of those items, the first five items will suffice.
Second Step: Determine how your countertops are attached to the base cabinets.  We removed all sliding drawers and took out some cabinet items to make room.  We found that there were screws holding our countertops in place.
Step Three: Remove all of the screws and KEEP THOSE SCREWS.  This is very important.
In case you're wondering, that's my hand.  Yes, I worked the screwdriver.  Like a boss.
Step Four: Using the utility knife, cut through the existing caulk along the backsplash edge.  You can also use a putty knife to scrape it off.  It will take at least a couple of passes with either tool.
Step Five: Lift the old countertops off and set them aside (they should just come off, but if someone glued the backsplash to the wall, you'll need to pry it off with a putty knife).  We plan on giving our old countertops to ReStore.  Set your new pieces on the cabinets to encourage yourself.
Step Six: Wonder why the countertop edges don't line up with the screw holes.  Huh.

Step Seven: Wonder what these pieces of wood are that are the same size as the depth of the countertops. Consult the instructions that give no indication of what to do.

Step Eight: Put two and two together and figure it out on your own.
Attaching wood strips to the bottom of the counter.  Why not just make them like this to begin with?
Step Nine: Once the wood strips are attached, put the countertops on the cabinets.  Use the old screws from the old countertop that I told you to keep.  Screw the countertops to the cabinets using the existing holes.  Sorry, too busy working.  No picture of this step.  Just imagine the picture from step three going backwards.

Step Ten: Use the caulk included in the Installation Kit and caulk the backsplash. 
Step Eleven: Smooth out the caulk and let it dry.  That's it!  You're done!

Well, maybe not completely done.  First, we still need to paint over the caulk and touch it up.  Second, we still have the long piece to install, but like I said earlier, that won't happen until next week.  

Let's compare!  
Countertops before
Countertops after
We are very happy with our new counters!  Just one more picture, that I found funny when we pulled out the stove:
We enjoyed the random napkin that had been hanging on to one of the vents for who knows how long.
Ta-Da!  Have a great weekend!

Wednesday, August 29

Upcoming Projects--They Never End!

Not much going on at the moment, but a lot coming in the future!  One very exciting development is that we got our new countertops.  I'll post pictures as we venture into the uncharted territory of trying to install them ourselves.  The hubs and I will attempt to replace the two small pieces around the stove, and my mom and stepdad will help us with the long section and plumbing in a few weeks.  Very exciting!
 
Cast iron pot
I mentioned a little cast-iron pot that I found at an antiques store while up in Michigan for the Fourth of July celebration a while back.  I love this little cauldron, and have been dying to find the time to make it pretty and like new again.  I even bought the Krylon months ago.  Now that the weather has cooled, I can attempt to remove the rust and give it a fresh coat of black paint, and then use it for decorating!  It's been sitting on the kitchen table since July, just waiting for its beauty appointment.
  
Recipe binder
With all of the reorganizing that I did a while ago in the kitchen, I decided to reorganize my favorite recipes into a new binder, which is taking longer than I expected, but the fact that I don't work on it every night might have something to do with that.  I'll eventually have all of my favorite, tried-and-true recipes in one convenient place, which will be a great help for meal planning.

New dress
I need to make a new dress for the McKinnis House programs.  I found a fabric that I absolutely fell in love with online at The Dressmaker's Shop, a great store for finding all sorts of reproduction fabrics.  I will alter the pattern that I designed to create my current dress, adding a few fancier elements to the dress, but still keeping it appropriate for the 1847 time period.  I think that is one of the things that I've really enjoyed about my volunteer time with this home--in-depth learning of how my ancestors lived.  I've picked up a lot, but there is still a lot I'd like to learn.
My new fabric--seems patriotic for a time of war!
My current dress--time to make a new one.  Pay no attention to the dog with human teeth on the door.

Cute little bottles!
I found these adorable little bottles at a garage sale a few weeks ago, and now I wish I had purchased all five or six that they had, instead of just a pair!  The are little pint bottles, which I'd never seen before, and I plan to use as little decorative bottles around the house.  They are from a local dairy that, as far as I can tell, closed up shop a long time ago.  Wouldn't it be neat to still have milkmen bring all of your dairy needs to your door?  I think it would be!

Christmas mantle cover
I am planning on making a mantle cover for our heater/fireplace in our living room this year.  I've already sketched out a design, now I just need to find the fabrics.  I plan to make it look like a patchwork quilt using squares of festive Christmas fabric.  I need something to cover the wood and protect the finish from all of the items that I like to set out for decorating, so darn, I guess I'll just have to be crafty. :)


New items for SFT
Speaking of crafty, have you stopped by The Sunflower Tree for fall decor?  I've added some cute little primitive pumpkins that are completely hand-sewn, and I'm making more.  I'd love for you to stop by!

Switch over to WordPress
And finally, I am likely going to be switching my blog over to WordPress sometime in the near future.  I've found Blogger quite easy to work with, but it's also plagued with small bugs and issues that have become increasingly frustrating over time.  So, after a lot of consideration, I've decided it's time to change.  If in the off chance that you have this blog bookmarked, you'll just need to change your bookmark, and I'll be sure to let you know once the WordPress blog is up and running.  I'll still post the link on Facebook for people to check out.  It'll have a more grown-up look, and in the long run, should be easier to manage.  Because I plan on doing this forever. Oh yes.

Owl Corner--Great Horned Owl

Great Horned Owl-photo from Wikipedia
The Great Horned owl lives all across the United States, in to Canada, and down through Mexico.  It can also be found in parts of South America!  It is a large species, and is well-known for the appearance of horns on its head, which actually are just tufts of feathers and do not aid in hearing whatsoever.  They prefer to prey on rabbits and hares, and are also known to include rodents, skunk, raccoons (!), many types of birds, including other owls (with the exception of the Snowy Owl), reptiles that range from snakes to small alligators, and have been known to carry away small dogs and cats.  That's quite a list, and it's not even half of what is listed!  They can carry prey that weighs two to three times their body weight.  When breeding, they will lay a clutch of 2-4 eggs, and will defend their nest with incredible aggressiveness, often continuing to attack the intruder until they die.  They tend to live a long time in the wild, up to thirteen years, and have been know to live thirty years in captivity.  This is by far the most common owl in North America, and everyone knows their call by the "whoooo-whooo" sound. 
Information comes from allaboutbirds.org and owlpages.com.

I tend to be a very task-oriented person (as you might be able to tell).  I enjoy making lists and crossing things off as I accomplish each item.  That's not a bad thing; in fact, if there weren't task-oriented folks in the world, I highly doubt that anything would get done in any timely fashion!  The problem is that it's easy to get too wrapped up in getting things done and not focusing on what is more important--relationships.  The story of Mary and Martha in Luke 10:38-42 is a great example of task-oriented vs. people-oriented: "Now as they were traveling along, He [Jesus] entered a village; and a woman named Martha welcomed Him into her home. She had a sister called Mary, who was seated at the Lord’s feet, listening to His word. But Martha was distracted with all her preparations; and she came up to Him and said, “Lord, do You not care that my sister has left me to do all the serving alone? Then tell her to help me.” But the Lord answered and said to her, “Martha, Martha, you are worried and bothered about so many things; but only one thing is necessary, for Mary has chosen the good part, which shall not be taken away from her."  I hate to admit it, but more times than not, I am Martha.  I struggle to not be focused on having a task to accomplish.  It feels good to accomplish something, but not nearly as good as it feels to have a real relationship with the Lord Himself, and all of those little tasks can really interfere with that relationship.

Wednesday, August 22

Small Kitchen Spaces--Make It Work For You!

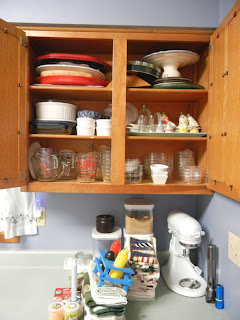
Again, on Friday, after working on the linen closet and making delicious goodies, I still had to work on the kitchen.  In my flurry of reorganizing and downsizing the kitchen, I seemed to acquire more space.  Amazing how that works!  I have accumulated so many kitchen things in the past eight years, and even though some of it sold in rummage sales of the past, I still have items that I can't bear to part with, either because they have sentimental value to me, or because I'm convinced that they will be used when we find our larger "forever" home.  So up in the cabinet they go, buried and inaccessible, until now.  Knowing that we will eventually be moving, I decided to pack up these items now, and save us the trouble when the time comes.  Plan ahead!  There are things that I used daily, and that is where I started with this project.  I attacked my spice cabinet, the cabinet over the stove.  I've never liked having the spices in that cabinet--I'm too short to see what all is up there.  My solution?  An idea from my mom, who keeps her spices right next to the stove.  I cleaned out three drawers in the bottom cabinets:
The towels that were in this drawer are now on the counter

One was full of extra decorative hand towels that I can get away with not having for a while, so those went to the packaway pile.  That gave me a whole extra drawer.  Now, I moved our "utility drawer" (most people call it a junk drawer, but we actually use the stuff in this drawer) over to the empty drawer by the doorway, making room for my aluminum foil, plastic baggies, wax paper and so on to be moved over one drawer, but still in close proximity to where I need it.  That still leaves me with an empty drawer.  Oh, so exciting...
I used drawer liner for the bottom of the drawer, but ran out of the tan color

I took all of my small spice jars down from above the stove.  I set them all out, and put like items together, and combined bottles that were half full or refilled the jars in my spice rack on the counter, and that eliminated a few bottles.  I began placing them in the drawer, keeping baking spices on one side and cooking spices on the other, and right next to the stove, which is so much more convenient and easy for me to see!  Now I know what I have, and I'll have a much easier time keeping an accurate inventory of what I need.  I love it now!  Thanks for a great idea, mom.  I kept the larger spice containers above the stove, but those are easy to see and easy enough to reach that it's not a problem.  I also cleaned out some things above the stove that I wasn't using, putting them in the packaway pile, which gave me some (*gasp*) empty space in the cabinet!  What now will I do with that?  I'm sure something will find its way up there.
Next, I moved on to the pantry.  Our pantry is really just a wardrobe that we bought at Lowe's and put together in the kitchen, but it works great for storing our food and other items.  Mostly, it just needed reorganizing, but there were some things that were either thrown away (expired, stale, what have you) or put in the packaway pile.  Below is a before and almost after picture:
But after rearranging everything to make it more accessible, I still wasn't done.  I had a few more ideas for two of the shelves in there, but was running out of time and energy and still had to work on dinner.  I put things on hold for the rest of the day.  For dinner, we had marinated pork chops, fresh green beans from the market, and this amazing twist on mashed potatoes that I found on The Pioneer Woman: Crash Hot Potatoes.  These are great, and a new favorite of hubby's.  You boil potatoes with the skins on, place them on an oiled baking sheet, smash them down with a potato masher (or if you don't have a masher, use something flat, like the bottom of a glass), coat them with olive oil, add kosher salt, pepper, herbs of your choice, and bake them at 450 for 25 minutes, or until they start to brown.  Then we added some shredded cheddar on top and baked them for five more minutes.  Oh, what a wonderful little potato!  A new favorite for both of us. Thank you, Ree Drummond, for your delicious recipes!  Be sure to check out her website and look for her show on the Food Network.

By this time I was pretty pooped.  I decided to put my reorganization on hold until Sunday afternoon, when I had some more free time.

Sunday afternoon, I attacked the kitchen.

It never knew what was coming.

I had a pile of packaway things, and still added more by going through another few cabinets and pulling more items out:
If you have given me any of the items you see in the packaway pile, please don't be offended.  I am keeping them, but I just don't have room right now for all of this in a functional kitchen.  Don't worry, it will be used again!

I also decided to go through my stash of cookbooks.  I love having them, but there are some that are used infrequently at most, and had to go away for a while.  I began packing my totes that I brought in from the garage, and in no time the first one was full.  I filled the second one about halfway with the remaining items. I had found my counter again, so I started on that.  These are before pics:


These are after pics:
I moved the coffee pot, which had lived on the counter for four years, to the shelf in the pantry with all of the coffee supplies.  It seemed like a good idea.  Then I moved my stand mixer, which had also lived on the counter for four years, to the shelf in the pantry with the cookbooks.  It seemed like a good idea.  Now I have lots of like items together, and I like that.  Then it was time to stop and get dinner started, thanks to my bread machine--we were having homemade pizza, so I had the bread machine mix up the dough as I continued to work.  So convenient!
This still looks cluttered, but it's not, and it's much more functional than it was
I then moved around some of the items on the counters, and put away my strainer in the space under the sink that I made a few days ago, and now it has a home when not in use (the space under our sink is tight because of the way they plumbed the sink.  It's really a pain to get under there, but I somehow made it work).  It looks so much better, and it is so much more user-friendly.  I have space on the counter to roll out doughs and crusts, and it doesn't look nearly as cluttered as it did.  Plus, when we go to install our counter tops, there will be much less to move beforehand!  It was truly a win-win, er, win-win-win situation.  It took some time, but was definitely worth it!
I know that every home is unique.  What works for us might not work for you.  But I'm hoping that this will at least inspire you to find ways to better use the small space that you might have!

Thursday, August 16

Interiors on a Tight Budget

I don't know why this never occurred to me before, but with the updates and upgrades that we've done to our house, I've never really shared any of the reasons why we do what we do.  I have a degree in Interior Design, so I thought I'd share some of my simple tips and suggestions for anyone else in our position (aka, champagne tastes on a beer budget, as Dave Ramsay would say).  Well, in the event of the remote possibility of putting our house up for sale sometime in the not-too-distant future, we are undertaking another project on our house: updating our kitchen.  Last December, we remodeled our one and only bathroom, and we've finally recovered from that debacle.  Now, we don't have $10,000 to spend on antique firearms, so we definitely don't have $10,000 to do a remodel of our kitchen.  Instead, we are going to work with what we do have: less money, and our own elbow grease (and perhaps we'll borrow someone else's elbow grease, too).  Here are a few tips to remodeling/redecorating what you have with what you have:

Tip #1)We took a day a few weeks ago to run over to Menard's and pick out new drawer pulls and hinges for our existing cabinets.  This was the least expensive part of the upgrade, and really, it can cost as much or as little as you would like.  It all depends on what you pick out!  We switched all of our cabinet hardware from the oh-so-fashionable brass of the '80s and early '90s to a brushed-nickel finish, that will soon coordinate with the new faucet that will fill our new sink with water.  It's truly amazing the difference that a small change like the hardware can make in updating a kitchen!  Now, I mentioned that we will also be replacing the sink and faucet, and those will go along with the new laminate countertop that we have on order.  We will be doing those projects in a few weeks, when the counters come in.  Which brings me to the next tip--
Old brass on left, brushed nickel on right
Old brass, tarnished and in bad shape
New brushed nickel hinges
First set finished!
Tip #2) Update your countertops while keeping your existing cabinets.  Countertops are pretty essential in a kitchen--you really can't work without them.  Therefore, update them accordingly!  In our case, we have a ranch house that was built in the 1960s in a neighborhood development (one of millions that went up during the housing boom of the '50s and '60s, as the baby boomer generation aged and were looking to buy their first house for their new families).  These houses were built quickly and cheaply to accommodate the growing population.  The house, while well-kept and at one time not that long ago used as a parsonage, was updated over the years using lesser-quality finishes, which brings us to today.  Because we are keeping the cabinets, we needed to go with something that wouldn't upstage the quality of the stock cabinetry of twenty years ago--and by that I mean, don't put a granite countertop on inexpensive, low-quality stock cabinets, because it just won't look right.  The finishes in your home should all match, not only in color, but also in quality.  Oddly, I've found that building materials of today, even though they may be stock items, seem to have a higher quality than those from fifteen or twenty years ago.  So, all of that to say this: laminate countertop was the only matching material to consider for our countertop replacement.  Even solid surface material would have looked too upscale (can you tell I hate my cabinets?) in an objective viewer's opinion. Currently, we have green counters.  I don't know why green.  They came with the house.  Fortunately, it's not the mildew-green or avocado green of the days of yore, it's much more minty in color, as you might have noticed from any photos that I have posted here or on my food blog.  It has been the bane of my husband's existence ever since we purchased the house, and we are now going to a neutral off-white with other flecks of neutral tones in it.  We repainted the house when we moved in, and the kitchen became blue, which helped tone the green countertops down a bit, but it was never palatable for hubs.  He's really excited to get this done.  Oh-and one other idea: you can paint your existing cabinets if you really want to give them a new look.  It seems to me that this idea only works some of the time, and the rest of the time it doesn't look good at all.  You have to have a solid picture in your head of the end result, or it will just look bad.  We are not going to do that anyway, but I had considered it in the past.  I think that in our case, it would be a "just look bad" situation if we painted the cabinets.  

Tip #3) Update your sink and faucets.  This is also a small change that can add instant appeal to someone looking to purchase a house.  It may seem like a small thing, but when a stainless-steel sink that has been around for years starts to accumulate that dull finish, and maybe some rust or other stains that Soft Scrub just can't remove, it makes everything else look dingy.  We chose to dump our stainless steel and replace it with a solid-surface sink.  I know what you're thinking--"didn't you just say that it was too upscale of a finish for your kitchen??"  I did indeed say that; however, I'm of the opinion that it's okay to upgrade your sink a step.  You use your sink for some heavy-duty stuff, right?  So get something a little heavier-duty to do the job!  What we chose was a plain white solid surface sink that is an inch or two deeper than our current tubs.  I desperately wanted a deeper sink for larger pots and pans, because ours just wasn't cutting it--it seemed like I was constantly splashing soapy water out of the sink when I would wash roasting pans and such.  We chose the solid surface sink to be purposefully plain in appearance, so that it would still fit in with the rest of the kitchen.  So yes, we kind of upgraded our selection there, but it's really not a big upgrade, and I stand by our decision.  And to go with the sink, we will be replacing the very plain chrome-finished faucet/sprayer combo with a slightly more decorative faucet/sprayer combo.  By faucet/sprayer combo, I mean that the faucet actually detaches to become a sprayer--all in one.  This one will be brushed nickel, to match the rest of the metal finishes in the kitchen.
Our new faucet, just waiting to be installed
Plain sink, but made of solid surface material

To sum it up (pardon the pun), here's an idea of the costs:
Kitchen hardware: $100
Sink: $150
Faucet: $120
Countertops: $350 (the biggest expense)
Garbage disposal (because it needs to be replaced, so why not?): $115
Miscellaneous plumbing parts, glues, nails, etc: Yet to be determined
Total so far: $700

This may sound like a lot, but really, to give a kitchen a facelift, it's not bad at all.  We will be saving money because we will be doing the installation ourselves (and with some help from others who actually know what they are doing), and we also were able to get an 11% rebate at Menard's, because it's a promotion that they run occasionally, so we will be getting about $80 in store credit for Menard's.  If you aren't in a hurry to complete your project, you can also save money by waiting until the individual items go on sale, instead of buying them all at once like we did.


The next thing on my list to do is reorganization. Here is a list of spaces in the house that I plan on reorganizing:
*Linen closet--reorganize with tubs and labels
*Closet shelves in bedroom
*Drawers in kitchen
*Pantry reorganization
*Closets

I will be posting my tips on reorganizing these tight spaces in the posts to come!  I've already started on the linen closet in the bathroom.  Yes, I'm facing my fears.

For those of you who don't care at all about decorating or interior design tips, you can learn something anyway in the Owl corner!

Snowy Owls
Photo from Wikipedia
Snowy owls are known for their white plumage and yellow eyes.  This makes them blend in very well in their habitats of the snowy Arctic regions in the summer and the Canadian and Northern United States regions in the winter. They are the largest owl by weight in North America, and have been known to defend their nests against such predators as wolves.  Their favorite meal is lemmings, but they will also hunt other rodents and small animals like rabbits, other birds, and fish.  The owls hatch with dark spots, but the male snowy owls become mostly white as they mature, while the females retain the black spots, making the sexes easy to distinguish. The amount of eggs laid at one time depends on the availability of food, and they usually lay between 3 and 11 eggs at one time.  So pretty!

Information taken from the National Geographic website and allaboutbirds.org.

ShareThis