Showing posts with label Menards Countertop Replacements tips. Show all posts

Thursday, September 13

The Kitchen...It's A Wrap!--Trying to Decorate, and a New Owl Corner


My Kitchen!
We finally finished!  We have a whole matching kitchen again.  My mom and stepdad kindly came down Friday afternoon and helped us with the installation and plumbing, and we were so grateful.  For the most part, things went as they should, and it took the majority of last Saturday.  We had a good time, though, and I think they did, too.  We made the pulled pork that I've mentioned many times before, and it cooked slowly the whole time we worked.  We were all pretty hungry by the end!  We enjoyed a delicious meal of pulled pork sandwiches, baked beans and green beans, with cupcakes for dessert.  I love my "new" kitchen now, and am more eager than ever to begin changing out the carpet in the living room and hallway for a nice wood laminate flooring and big area rug.  I believe that will complete all of the cosmetic changes we plan to make on the house before we consider putting it up for sale.  At least we'll be able to enjoy the changes we've made until then!  Here are some pictures for your enjoyment:
Deh-cor-ay-shee-uns
I am itching to decorate.  However, I've also had a ton of crafty ideas lately, and can't seem to find the time to do all I want to do while working during the day, taking care of dinner, dishes, laundry, and all of the other housework things that also need to be done.  I'm making more pumpkins (to decorate with, as well as sell), I purchased fabric for a mantle cover (which will look nothing like what I designed--I've decided that there is just not time to create the masterpiece I had in mind before Christmas comes and goes), various house decorations, and some awesome glittery wall decor, which will be a DIY tutorial on here in the very near future.  I seem to get a lot of ideas when I have the least amount of time to complete them, and then I get frustrated and feel like I never get a chance to do things I want to do, because I don't have the energy in the evenings to work on things I want to make.  Does that even make sense?  I have all of this ambition in the morning and early afternoon, and make all sorts of ambitious lists of things I want to accomplish, and then I get home and decide that I don't feel like making that delicious from-scratch pot pie, so we have fish sticks, and I don't feel like folding the laundry, so it stays in the dryer for days, and I would rather veg out on the couch instead of washing the dishes, at which point the pile of dirty dishes from dinner begins to resemble a stinky art sculpture in the sink.  At least my sink is deeper now, and can hold more dirty dishes.  But decorating must be done--it's something I look forward to doing every year, and something I hate to take down once the holidays are over.  It's really a vicious cycle.

Goodsmith's
Because I needed one more thing to do, I opened a shop on Goodsmith's.  Goodsmith's is a small, but unique, online shopping site, somewhat similar to Etsy, but still up-and-coming.  They have lower fees for selling, and listing is free.  I saw an ad in the Better Homes and Gardens Christmas Ideas magazine that I picked up at the store last weekend, so I'm hoping that others who buy the magazine will give it a look and maybe bring some new traffic and sales my way.  If you have time, check it out!  Let's support artists and crafters in the U.S. and stimulate the economy the way it's meant to be done--through we the consumers, not the government!

Owl Corner
Today we will learn about the Western Burrowing Owl.  He's cute!  These guys can be found throughout the western U.S., a little into Canada, and into Mexico.  They are also found in western Florida.  This is a small to medium-sized owl, usually standing just under a foot tall.  They are known for their long legs and brown color, and usually have light brown to cream colored spots on the upper parts of their bodies.  As their name indicates, they burrow in the ground to make their homes and nests.  They will either dig their own new hole, or they will use abandoned holes of ferrets, prairie dogs, and other underground rodents.  They feed on beetles, grasshoppers, mice, rats, small ground squirrels, and other small rodents, and will even eat fruits and seeds, unlike other owls.  They usually only have one mate throughout their lives, and can lay a clutch of anywhere from one to twelve eggs, and their average nest size is seven eggs.  These owls are considered to be threatened/endangered.
Photo from sdakotabirds.com, taken by Terry Sohl.  Information from Owling.com, The Owl Pages, and thebirdersreport.com.

Hubby was gone again this week for work.  I struggle so much with loneliness when he's gone, because we have no family and no real friends per se here.  I have to remind myself constantly that I'm not alone, even though I can't physically see my Friend.  So when you find yourself faced with a lonely time, whether it's an hour, a day, a week, or a lifetime, just remember that if you have put your faith in the Lord, He will never leave you, and you are never alone.  Psalm 34:17-19 says, "The righteous cry out, and the Lord hears them; he delivers them from all their troubles. The Lord is close to the brokenhearted and saves those who are crushed in spirit. The righteous person may have many troubles,but the Lord delivers him from them all", and Hebrews 13:5 says, "...because God has said, 'Never will I leave you; never will I forsake you'”.  Those promises provide comfort to those who are hurting and lonely.


Friday, September 7

Countertop Update, Milk Jug Vases and Monster Cookies

I'm very excited--we are finishing our countertops this weekend!  I'm looking forward to it.  I'll be sure to post pictures so you can see the finished product.

What have you been up to?  Even though the week was shorter than normal, it felt long.  Hubby and I both thought a normal week would have gone faster.  I seem to look forward to the weekend more and more, because that's the only time I have the energy to do things that I like to do.  Today I've been busy preparing for my mom and stepdad's arrival, baking, cleaning, grocery shopping, running errands, etc.  We will be having pulled pork this weekend, so I picked up a ten pound pork shoulder, so that we might have some left over for later.  It tastes and smells so good!  It's roasted in the oven, which is good, because we don't have a smoker.  If you'd like to see the recipe, click here: Spicy Dr. Pepper Pulled Pork .  I wish I could take credit for this recipe, but I can't.  The recipe comes from The Pioneer Woman, Ree Drummond.  She has some great recipes, and the kind of life I dream of having.

After more consideration, I think I'll give Blogger a stay of execution.  If you read this blog fairly regularly, you'll notice that I changed the look considerably, which makes me happier.  I am still in the "clean up-condense-get rid of-can't stand clutter" phase, which is a reason behind the change, but there were also some glitches with Blogger that gave me fits with pictures and such, and eliminating some of the blog elements takes care of that.  So, for now, I'll be sticking to Blogger.  I'm a woman, and I reserve the right to continue to change my mind as much as I want.

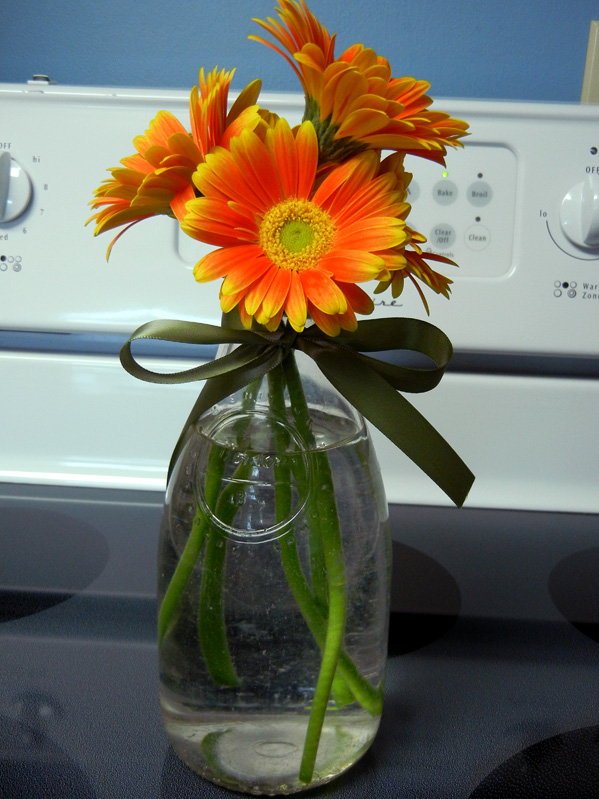
At the grocery store today, I found a bright cheerful bouquet of miniature Gerbera daisies.  I couldn't resist--I bought them.  This is why I keep buying little decorative bottles for around the house.  I love to use them for vases!  They have a kind of old-fashioned look.  Here are some pics for your enjoyment:
Old Borden's Milk Jug, Dark Sage Satin Ribbon, and Gerbera Daisies.  Simple, yet elegant and cheerful.
My little garage sale half-pint milk bottles, and daisies.  No other decoration is needed, in my opinion.  Set them on your counter...
Or put them on your windowsill for something cheerful while you wash dishes.
And finally, I experimented with a monster cookie recipe last weekend, and thought I'd share it with you.  I had a hard time even finding a recipe to begin with!  Are they just not popular anymore?  I finally found one in an Amish recipe book, and then I decided to alter it a bit.  I call these "Stick To Your Ribs Monster Cookies".

You'll need:
1/3 C butter or margarine, softened
1/3 C sugar
1/3 C brown sugar, lightly packed
1 large egg
1/4 tsp vanilla
1 tsp baking soda
1/2 tsp cinnamon

1/2 C peanut butter (crunchy or smooth)
1/4 C flour
1 C rolled oats
2/3 C chocolate chips
2/3 C M & Ms

What you do:
Preheat oven to 350 degrees.  Cream together your butter and sugars.  Add egg, vanilla, baking soda, cinnamon, and peanut butter, mixing well after each addition.  Add the flour, mix well, and scrape the sides of the bowl.  Then add the oats, mixing well and again scraping the sides of the bowl.  Add your chocolate chips and M & Ms, and mix in by hand.  Drop by rounded tablespoonful onto a baking sheet lined with parchment, and bake for 15 minutes, or until the edges begin to brown slightly.  Remove from the oven and let cool on the cookie sheet for another five minutes, then move to a cooling rack.  This recipe makes around 20 cookies.  Keep them in an airtight container, or wrap individually and freeze for later.  Good and filling!


Sunday, September 2

Business Cards, Garden Goodies, and New Countertops!


Happy Labor Day weekend!  We are having a good, relaxing weekend.  Hopefully you are too!  We took the opportunity yesterday to go to Toledo to do some shopping and eating.  I wish there was more to do in our town...we get pretty bored here some times, and have to get out and go elsewhere to find things that we need.  We also have a limited restaurant selection here, so we enjoy getting to go places that have more options.  I believe that we are both spoiled by our experiences living elsewhere, so we kind of miss having the choices that we used to have.  But we survive. 

I had to share these: Mini Moo Cards--these are little business/calling cards, that are the length of a regular business card, but half the width.  Moo (the printing company) was offering one hundred free mini card to Etsy sellers (just had to pay $5.00 for shipping) and they printed whatever you wanted on the cards.  And they printed both sides, which is usually an extra charge, so it was a nice bonus.  I had been wanting to order some business cards lately, to include in packages when someone buys something, but couldn't justify the cost, so this deal was perfect (and they gave me a discount code to share, so if you need cards, send me a message and I'll send you the code).  I would certainly recommend them--they were really easy to create, and they got to me quickly!
My cards came in a little box that can be used to keep others' cards in it, too!
A set of my cards.  I was able to select whatever image I wanted for the back, and then create a simple card on the front of each one.  So cool!

On the garden front, I am actually getting a few cucumbers.  Nothing major, but considering I thought the garden was beyond saving for the year, it's a small victory.  Here is a picture of my first cucumber from the garden:
Haven't eaten him yet--he's too cute.  I think I shall call him Stub.
 I was also surprised last week, while I was examining my vegetables, to find that I had two more small pumpkins beginning to grow!  I have decided that I can't stand the thought of the mystery creature getting these, so I went out and bought a bottle of Liquid Fence deer and animal repellent and sprayed my whole garden and garden perimeter.  It's food safe, as long as it's not applied right before harvesting.  That stuff smells awful!  But, hopefully it will be successful at repelling critters around my garden.  Not only does it have rotten eggs in the ingredients, but it also has cayenne pepper juice as well.  It works on the odor/taste repellent idea--if it smells bad, and it tastes bad, the animals will leave it alone.  I will have to let you know how it works.  I know I found it particularly repelling!

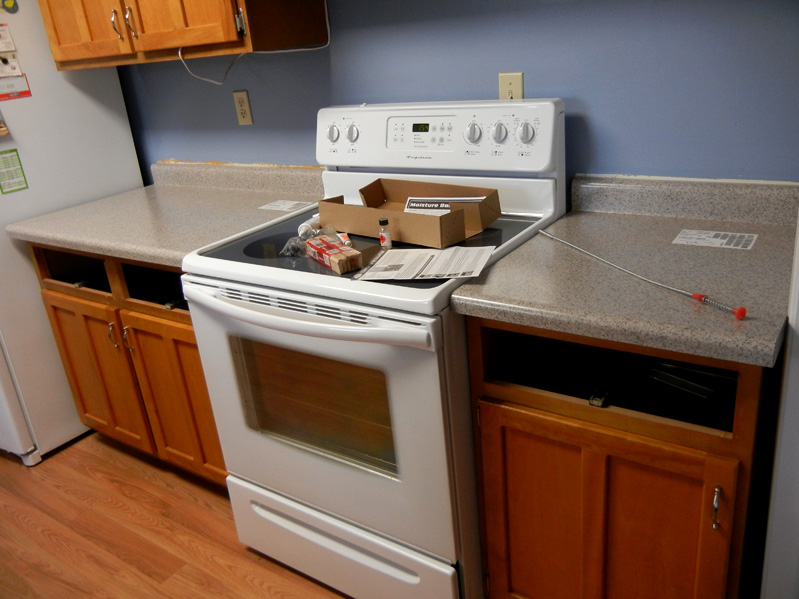
We took some time today to attempt to replace the two smaller pieces of countertop, and I'm glad to say we were successful!  It was easier than either one of us expected, and now we know what to expect for the long piece that my mother and stepfather will come down and help us replace next weekend.  We are so excited, now that we see what the smaller pieces look like on the counters!  (Insert big cheer sound here.)  I'll show you what we did, in case you decide to take on this project yourself.

First step: Assemble the necessary tools for the job.  For this, we needed a power drill, Philips head bit, a square bit (which we found out later), a utility knife, a putty knife, a dime, a penny, a used Cincinnati Reds ticket stub, and of course, a sandwich and drink from Jimmy John's (the sandwich had been eaten by photo time).  Now, if you don't have all of those items, the first five items will suffice.
Second Step: Determine how your countertops are attached to the base cabinets.  We removed all sliding drawers and took out some cabinet items to make room.  We found that there were screws holding our countertops in place.
Step Three: Remove all of the screws and KEEP THOSE SCREWS.  This is very important.
In case you're wondering, that's my hand.  Yes, I worked the screwdriver.  Like a boss.
Step Four: Using the utility knife, cut through the existing caulk along the backsplash edge.  You can also use a putty knife to scrape it off.  It will take at least a couple of passes with either tool.
Step Five: Lift the old countertops off and set them aside (they should just come off, but if someone glued the backsplash to the wall, you'll need to pry it off with a putty knife).  We plan on giving our old countertops to ReStore.  Set your new pieces on the cabinets to encourage yourself.
Step Six: Wonder why the countertop edges don't line up with the screw holes.  Huh.

Step Seven: Wonder what these pieces of wood are that are the same size as the depth of the countertops. Consult the instructions that give no indication of what to do.

Step Eight: Put two and two together and figure it out on your own.
Attaching wood strips to the bottom of the counter.  Why not just make them like this to begin with?
Step Nine: Once the wood strips are attached, put the countertops on the cabinets.  Use the old screws from the old countertop that I told you to keep.  Screw the countertops to the cabinets using the existing holes.  Sorry, too busy working.  No picture of this step.  Just imagine the picture from step three going backwards.

Step Ten: Use the caulk included in the Installation Kit and caulk the backsplash. 
Step Eleven: Smooth out the caulk and let it dry.  That's it!  You're done!

Well, maybe not completely done.  First, we still need to paint over the caulk and touch it up.  Second, we still have the long piece to install, but like I said earlier, that won't happen until next week.  

Let's compare!  
Countertops before
Countertops after
We are very happy with our new counters!  Just one more picture, that I found funny when we pulled out the stove:
We enjoyed the random napkin that had been hanging on to one of the vents for who knows how long.
Ta-Da!  Have a great weekend!

ShareThis