Sunday, March 31

Happy Easter!

Romans 6:8-11: "Now if we died with Christ, we believe that we will also live with him. For we know that since Christ was raised from the dead, he cannot die again; death no longer has mastery over him. The death he died, he died to sin once for all; but the life he lives, he lives to God. In the same way, count yourselves dead to sin but alive to God in Christ Jesus."

Happy Easter!  I hope everyone has had a great day.  I had a nice, relaxing long weekend with my husband, who didn't have to work on Good Friday.  It's a nice little bonus holiday for him.


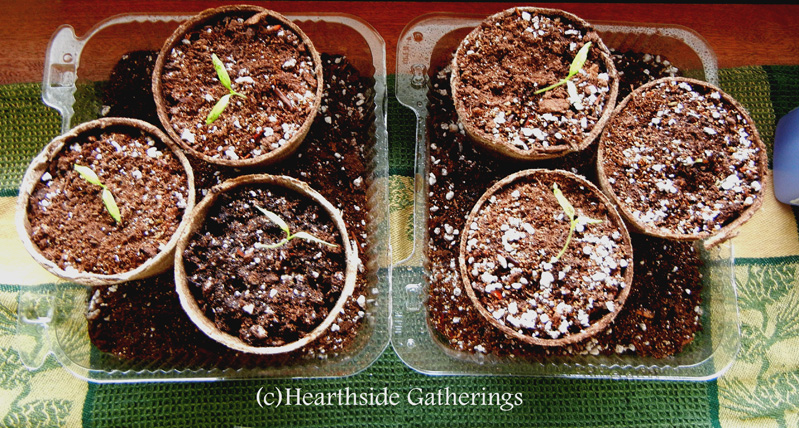
Tomato Seedling Update
Well, I lost my patients.  All but one of the tomato transplants have withered and died.  I was so sad when I saw them the next morning...one of the plants was doing well until a few days ago, when it too began to wilt, and there was no recovering it.  One plant remains, and it's better than none, but I had hoped for a better outcome.  Lesson learned, sadly.

There is still hope for the tomatoes.  Click on this post to see what happenedTomato Seedling Surgery 2.0


Gluten-Free...For Now?
I have had quite an eventful week this past week.  After a month of having strange stomach and intestinal problems, I visited my doctor, who thinks I have a gluten allergy.  Not the greatest news for one who lives for gluten-based foods like pizza, pasta, breads, cereals, cakes and cookies.  I have been ordered to remove any gluten from my eating choices for a month, and then return for a check-up.  I haven't had stomach problems up to this point, so I'm hoping that the diagnosis is not accurate.  Honestly, I have really struggled with this, because that completely destroys all of my meal planning for the month.  I have no idea what to make for meals now.  I don't have the time or interest to make every single meal from scratch...I, as most people do, depend a lot on convenient pre-packaged grocery items to help me with cooking.  I spent $56 on baking and cooking substitutions of rice flour, gluten-free all-purpose baking mix, gluten-free bread crumbs, gluten-free quick oats, and a few other things.  Gluten-free items are very expensive.  Should it be determined that I'm allergic to wheat, or that I have celiac's disease, I'm  honestly not sure how I will afford the new grocery bills.  It's a huge adjustment in lifestyle, and one that I really don't want to make unless I absolutely have to.  I'm sure that I'll post more about this at a later time.  For now, I ask for prayer, that God will heal me and my life won't have to drastically change.  It's not just my life that will change; my husband will be affected, too.  It's difficult to know that you will suddenly become a burden or annoyance to others.  I know that those who love and care about me will be understanding, but those people are few, and the world is a huge, unaccommodating place.

If you are interested in more information, visit this page: Non-Celiac Gluten Sensitivity

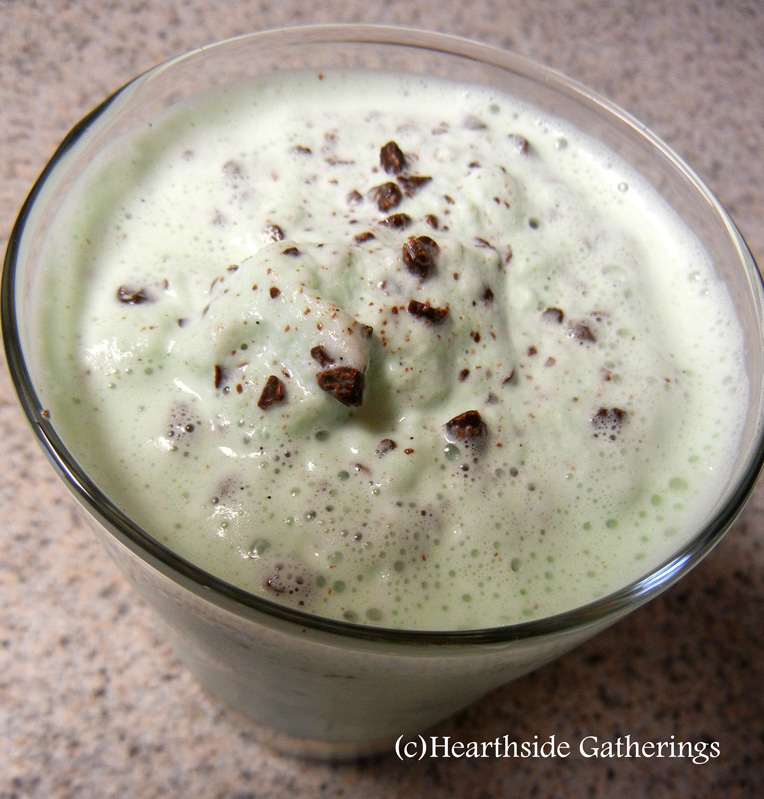
For some gluten-free recipes, visit my Pinterest board: Gluten-Free.  I have tried the pizza crust recipe posted there (not terrible), and I hope to try more of these these recipes soon!
Another Project
Hubby and I spent Friday and Saturday having fun together.  While we were out on Friday, we went to the local antique shop to look for something specific.  However, I walked out with another set of sleigh bells!  Oops, I just can't help it.  These are smaller bells than the last set I purchased, but I will be restoring these myself.  I sent the last set away to be restored, but I feel confident enough now to want to try this on my own.  These bells are quite a bit smaller than the others, only about 2" wide, and will make a nice small decorative strap in the future.  I'll post the process on here when I have time to start working on them.


Happy Easter...He is Risen!!

Sunday, March 24

Tomato Seedling Surgery

Just as tiny seedlings must struggle against the weather and nature to survive and finally provide nourishing fruit, so must we also brave the storms of life to become fruit-bearing children of God: "But the fruit of the Spirit is love, joy, peace, patience, kindness, goodness, faithfulness, gentleness, self-control; against such things there is no law." Galatians 5:22-23

Here is an update on the tomato seedlings: Tomato Seedling Surgery 2.0

I finally got a chance today to transfer my tomato sprouts to their grown-up pots.  It seemed fitting, since it is finally spring and yet another snowstorm is bearing down on us.  I only had three pods that sprouted anything, but those three pods gave me six plants.  I've never had all of the seeds planted in the pods start growing, so I decided to split those plants into their own pots.

Here's what I did: I spread newspaper over the countertop, then assembled my supplies: Jiffy biodegradable planting pots, available at any garden center; planting soil mix, a take-out plastic container, with the bottom and lid cut into separate trays, and your seedlings.  If you have a spray bottle that can spray fine mist, you'll probably want one of those with you, and if you have a small pair of scissors that you don't mind getting dirty, grab those too.

I took my first peat pod and seedling and cut the netting around the peat.  I pulled it down, but didn't pull it off (there was no need-there was only one seedling in there).  Simply fill the planting pot about half full with planting soil, stick your seedling inside, and fill the rest of the way with dirt.  I like to bury a little extra of the seedling to give it added stability.
For the pods that had multiple seedlings, I cut the peat pod netting completely off, and VERY GENTLY crumbled the peat into the planting pot.  The seedlings don't have deep roots, and they weren't grown together, so I simply (and again, GENTLY) pulled them apart.  I filled the pots at least halfway with soil and planted each seedling at about half or three-quarters depth, then poured more soil around it, mounding it a bit to give the seedling a little bit of support.  I did this for all multiple seedlings. 
I spread planting soil in a thin layer across the bottom of both trays, then sprayed it with my spray bottle.  I wanted it damp, but not wet.  I also sprayed all of the pots with the sprayer, to dampen the soil.  Then I watered everything well and placed the trays in the window with the most light, as well as a heating register to provide added warmth.  Our house stays at about 65-68 degrees in the winter, so it should be warm enough, but any added warmth is always good.  Now, we wait and see how the surgery went.
Since transplanting things a few hours ago, I've seen some drooping in some of the seedlings.  I'm aware that any type of transplanting causes a plant stress, and I'm hoping that they make it through this.  I'm bringing this up because I hope that by sharing my experiences, others can learn from my trials and errors.  Some things work, and others don't.  I didn't grow up knowing how to plant and grow things--I'm a city girl!  I didn't have grandparents or other relatives who showed me what farm life is like.  I know that there are others who are in the same boat.  I'm learning about gardening as I go...er, grow!

Who survived the transplant?  Click here to see the post: Happy Easter

Saturday, March 16

Puff Pastry Cinnamon Bites--Fail!

I made chicken turnovers last night for dinner.  Usually I only need one sheet of puff pastry to make them, since it's just the two of us, so there's usually a sheet left over.  I try to find ways to use the extra sheet, since I have found that thawing and re-freezing the extra sheet seems to affect the texture when I do go to use it.  Most of the time, I just make dessert turnovers to go with the chicken turnovers.  Last night, though, I had an idea: why not make them into little cinnamon bites?  How could that go wrong?

I spread a light layer of powdered sugar on the counter, instead of flour, to prevent sticking.  I brushed both sides with a dusting of the powdered sugar, and rubbed some on my rolling pin, too.  I rolled it out just enough to make the fold creases stronger.
Then, I melted 3 TBSP of butter in the microwave.  While it was melting, I mixed together 2 TBSP packed brown sugar, 1 TBSP white sugar, and 1 tsp of cinnamon together in a small bowl.  Then I brush the butter over the entire pastry, leaving about half an inch around the entire perimeter of the pastry sheet untouched, and spread the sugar mixture over the butter.
I rolled up the bottom edge of the pastry.  As you can see, mine got a little loose toward the ends.  I sliced the roll evenly in half, then sliced each half in half, until I had eight equal pieces.  Then, since I'd handled the dough so much and it had become a bit soft, I placed the pieces on a baking sheet lined with parchment, covered the entire thing with foil, and refrigerated it overnight, because I thought these would be a great breakfast treat.  They looked so cute sitting on the tray, just expecting to grow up and become the best breakfast pastry in the world, but life is sometimes unfair.


This morning, I got up, eager to bake my pastries.  I heated the oven to 400 degrees, waiting patiently for it to actually heat up all of the way.  I'm not known for my patience.  While I waited, I mixed up a cream cheese glaze to go on top of the little buns.  I mixed one ounce of light cream cheese, at room temperature, with 1/2 C of powdered sugar.  When that was combined, I added 1/2 tsp of vanilla and mixed that in.  Then, I added 1/2 TBSP of milk, mixed it again, and tasted it.  Perfect.
I took off the foil, and stuck my cinnamon pastries in the oven to bake.  I started the timer at 8 minutes, and when that was up, I added another 8 minutes.  All the while, I saw that my delicious sugar-cinnamon filling was leaking out, melting and carmelizing on the parchment paper.  It was at that point that I began to see the flaw in my idea.  Insert sad cartoon horn sound here: waaaa-waaaaaa.

After the 16 minutes were up, and much of the inside stuff had leaked out, I called it.  I pulled them out of the oven, and in my defense, they looked done.  I put four on each plate, and spooned the glaze over top.  They looked and smelled good, again in my defense.
However, when we bit into them, we saw that they were not cooked.  We like gooey, slightly undercooked cinnamon rolls, which was what I was going for, but this was too undercooked, and was just disappointing.  Plus, the sugar-cinnamon mix on the bottom of the pastries was starting to harden into crunchy candy, and was sticking to the plate.  Double disappointing.  So, I guess I learned my lesson, and will use regular bread dough next time.  Sometimes these things just don't work out in real life as well as they go in my head!

Two good things did come out of these: a delicious glaze, and a buttery, caramelly crunchy candy.  Oh well.  Always look on the bright side of life!

Thursday, March 14

Minty chocolate chip shake for you!

I think I have spring fever.  Last weekend made me long for the coming days of warm weather, tee shirts, open windows, and ice cream.  That made me think of milkshakes.  When my husband was on 12 hour midnight shifts, he'd leave for work around dinnertime and spend the entire night in the office.  Sometimes I'd bring him a milkshake to help his night along.  Thankfully, those days are gone, but we both still love milkshakes.  With St. Patrick's Day this weekend, I started craving a delicious minty shake with chocolate chips, but didn't want to go out and get one, because it's turned cold out again.  What's a girl to do?  I'll tell you what this girl did: improvise!

So how do you go from this:

To this?:

Pretty simple, really!  Get out your blender, here we go!

I'm only making enough for two milkshakes here.  Adjust the measurements according to your needs (i.e., if you need to make four shakes, double this recipe.  If you need to make one shake, half this recipe).

2 C vanilla ice cream of your choice
1/2 C milk (more or less, depending on the consistency you like)
1/2 tsp peppermint extract (go light on this, and adjust it to your taste)
1/4-1/2 C miniature chocolate chips (I like semi-sweet)
5-10 drops of green food coloring

Combine the milk and ice cream using your blender.  Stop mixing a few seconds before you get a smooth texture.

Add your peppermint, chocolate chips and food coloring.  Finish blending together.  Add more milk if you want a thinner shake.

Pour in your glasses and enjoy!

Of course, you can also just blend mint chocolate chip ice cream and milk together and get a very similar flavor, but where's the fun in that?

This would also taste really good using homemade vanilla ice cream, and you would have control over the ingredients in the ice cream, too.  I have an ice cream maker, but didn't have the time to make any.  When my homemade vanilla extract is ready, maybe I'll make time!

Sunday, March 10

Spring Wreath, Inspired by Pinterest


"For ground that drinks the rain which often falls on it and brings forth vegetation useful to those for whose sake it is also tilled, receives a blessing from God." Hebrews 6:7, NASB

Today is a beautiful Sunday!  I have spring fever, for sure.  The temp is in the 60s, and I have some windows open for the first time in 2013.  I'm listening to a new CD by one of my favorite musicians, and felt like being a little crafty.  I saw a pin on Pinterest a while ago and have wanted to make it for spring decorating, and today seemed like the perfect lazy Sunday to do so.  It's really easy to do, and you can even make it while you are watching your favorite program on TV.  You can also customize it to fit the season, if you use a little imagination.  Let's get started!

Supplies
  • One 12" green foam wreath form
  • One skein of Yarn Bee brand haute fur, cypress color, 76 yards (I found it at Hobby Lobby)
  • One roll of 1 1/2" wide by 9' wired satin ribbon, your choice (you could go a little wider, too)
  • One yard of 7/8" daisy ribbon trim (I couldn't find rolls of it, but I found it for sale by the yard at JoAnn crafts)
  • One package of 1 1/2" long pearlized pins, your choice of color heads
  • Fray check (not pictured)


Step One: Wrapping the yarn
Start wrapping the yard around the form by holding a short length of the yarn with your thumb, while bringing the yarn over the piece you are holding with your thumb.  Wrapping the yarn over the piece you hold with your thumb will hold the loose end in place as you continue around the wreath form.
Try to wrap this part tightly and keep the strings close together.  Once you have the beginning piece completely covered, you can start going faster, wrapping the strands more loosely and then pushing them together.
 
Continue in this fashion until you've covered the entire form.  It'll probably take about an hour.  I listened to/watched two episodes of Good Eats while I worked on this.

Step Two: Securing the end of the yarn
When you finally get to the end of the wreath, pat yourself on the back.  Then leave about 8"-10" of string attached after you cut the end.
Take out a pin, and tie the end of the yarn around your finger.  Not tightly, and not in a knot.
Take the loop off of your finger, but don't tighten it yet.  Take the pin and insert it through the loop you made on your finger.  Tighten it around the top of the pin, underneath the pin head.  Then wrap the remaining little end of string around the rest of the pin, wrap the length of string around the wreath form.  Insert the pin into the foam to hold the end in place permanently.
 
Now your wreath should look like this!


Step Three: The bow and hanging ribbon
Cut a piece of ribbon about 2 1/2' long for the bow.  Then cut another length of ribbon for hanging; this length depends on how long you want the wreath to hang down.  I cut my length at about 3', but then shortened it quite a bit later.  Wrap the 2 1/2' length of ribbon around the same spot that you pinned the end of the yarn, and tie it once loosely.  Now, take the hanging ribbon and thread it through the bow ribbon.

Now, tighten the bow ribbon, and tie a knot.  This will secure the ribbon.  Then tie the bow.  Remember when  you were first learning how to tie your shoes, with bunny ears?  I've found that to be an easy way to get a decent-looking bow that stays fairly straight and neat.  That's the method I used to make my bow.
We'll trim and treat the edges of the ribbons later.

Step Four: The flowers
Now we need to separate the flowers.  Cut each apart and set them in a cute little pile.
Arrange the flowers on the wreath before you pin them in place.  Once you have them where you want, pin away!  Put as many on as you like.
 

Step Five: Trim the ribbon ends and treat them
Cut the ends of the ribbon, either by angling them or cutting them in a wedge.  Spread a thin layer of Fray Check along the cut edges.  Tie the hanging ribbon to your desired length and cut an angle along the edges of those ribbons.  Treat these ends with Fray Check as well.

Step Six: Hang and enjoy!


All told, I used a bunch of coupons between Hobby Lobby and JoAnn Fabrics, and the total of all of the materials came to around $20.  Not bad, I thought!

Tuesday, March 5

Tomato Time!


"Then God said, “Behold, I have given you every plant yielding seed that is on the surface of all the earth, and every tree which has fruit yielding seed; it shall be food for you; and to every beast of the earth and to every bird of the sky and to every thing that moves on the earth which has life, I have given every green plant for food”; and it was so." --Genesis 1:29-30

Well, it's finally that time of year...time to start the tomato plants!  I'm in Zone 5, so tomato planting usually happens in the last half of May.  Starting them now will give them plenty of room to grow and strengthen before I start acclimating them to the outdoors.  Last year, I kept seeds from an heirloom cherry plant that I purchased at a local greenhouse with the intention of growing them into new plants this year.  My husband loved these cherry tomatoes, so I kept as many seeds as I could.  From what I have heard and read, you really only want to keep seeds from heirloom plants, because if you go to the grocery store and save the seeds from, say, a regular green pepper, and then attempt to grow a new plant from those seeds, you really won't know what might come up.  The fruits and veggies at the grocery store are most likely genetically modified in some way, and also likely a hybrid of other plants, and therefore can't be expected to grow like a normal plant in normal conditions and normal soil.  If you purchase seeds to start your own plants, and want to reuse the seeds again next year, be sure to purchase heirloom seeds or plants, as these are most likely to be untouched by modern science and fairly reliable in growth and yield each year. 

Last fall, I separated the tomato seeds from the slimy goo inside of the tomatoes and rinsed them well (by the way, I'm not a fan of eating tomatoes raw.  I'm slooowly coming around to eating chunks of tomato in food dishes.  I do, however, love tomato-based foods like ketchup and salsa!  Weird, huh?).  Then I let them air dry on the counter for several days, placed them in a resealable baggie, and stuck them in the freezer for the winter.  Now they are in their new home of warm moist dirt, near a heating register and in the sunniest window we have.  Here come the tomatoes!  I'd love to invest in a heating pad for the seeds, but we just don't have room for a little greenhouse rack right now.  I have successfully started plants like this before, though, so I'm not too concerned.  Depending on how many come up, some might even be headed to new homes in the months ahead.


It's pretty inexpensive to start seeds--much cheaper than going to the greenhouse and purchasing the plants that you want to grow.  It depends on how much you want to grow, but you might spend a total of $5-$10 to start seeds, whereas if you purchase the plants from a greenhouse, you'll spend at least twice that amount.  Granted, the work's been done for you, so to speak, and all you have to do is plant them, but starting from seeds is more fun, less expensive, and much more satisfying!  I'm only starting tomatoes inside, so I decided to make my own little greenhouse out of some old carry-out boxes that I kept specifically for that purpose.  It's much smaller and space-friendly than the larger greenhouse boxes that I have previously purchased and used.  I used peat pellets that I had on hand to start the little seeds, then I added some starter soil that I bought on clearance last fall for when they need more soil to keep growing.  Fall is a great time to stock up on clearanced items that you can use in the spring for your new planting season.
I'm going to try and get nine plants from the seeds I saved.
I have three seeds in each peat pod.  You can see them here before I covered them lightly with the dirt.
The carry-out box with the warm, wet pods inside.  You can see the condensation on the inside.  I only snapped one side closed, to allow for slight air circulation.  I'll mist the plants every day or two to keep them wet.
Here's an update on my homemade vanilla extract.  You can see how dark and rich-looking it is now.  It's been three weeks since I submerged the beans in the alcohol, and the scent is intoxicating!  A strong, rich, sweet, yet alcoholic smell that will continue to steep for another five weeks before I taste it, but I'm already very excited.  Oh, the cookies I will make!  If you didn't see the original post with instructions on how I am making my extract, click here: Makin' Homemade Vanilla Extract.

ShareThis