Showing posts with label Homemade vanilla extract. Show all posts

Friday, May 24

Vanilla Sugar--What Is It, and How Do I Use It?

Ahh, vanilla beans...the pod that keeps on giving.  It's been a few weeks since I posted that I am using the leftover vanilla beans from my extract to make vanilla sugar, something that has been floating around the culinary internet universe for a while now.  Alton Brown has even posted a "recipe" for it on the Food Network website.  If it's made it onto Good Eats, then it's definitely worth exploring, in my opinion!  It's absorbed some of the vanilla bean flavor, and is now ready to use.
So what is it?  It's pretty much what the name implies: white sugar infused with vanilla bean flavoring goodness.  How do you make it?  Easily!  I took the clean jar that I steeped my extract in, and once it was completely dry, I added three cups of white sugar while dropping in my vanilla bean pieces intermittently.  I dropped in one and a half beans total.  I screwed the cap on and shook it, and lo and behold, began to see caviar specks amongst the sugar crystals.  I opened the jar and inhaled, and it smelled like sweet heaven and sugar.  Oh, so good.  One thing I've noticed, though, is that the beans still have moisture in them, despite the fact that I let them sit out and air dry for several days before adding them to the sugar, and this has caused the sugar to clump together.  I've spread the sugar out on a tray to hopefully evaporate the moisture in the sugar, and then I will store it in a container without the beans.
You can use this in place of adding vanilla extract to your recipe, or you can leave the vanilla in and use it as you would regular sugar.  Why not sprinkle a little on your corn flakes in the morning?  Or in your coffee or tea?  Or try it as a substitute for sugar in my French toast casserole recipe:

Ingredients:
½ loaf of Texas toast, torn into pieces
4 eggs
1 cup half-and-half
1/2 cup milk
3 tablespoons vanilla sugar
2 teaspoons vanilla
1 tablespoon cinnamon
1 teaspoon nutmeg
1 stick butter (unsalted is preferred)
1/2 cup brown sugar
1 cup pecans (optional, we didn’t use)


Directions: Spray a 9x13 baking dish with non-stick cooking spray (don't skip this step--we learned that the hard way).  Spread the bread pieces evenly in the pan, then mix together in a separate bowl the eggs, half and half, milk, sugar, vanilla, cinnamon, and nutmeg.  You could add more spices, or additional spices, if you would like here.  Pour this mixture over the bread, and toss the bread to coat the pieces.  Cover with plastic wrap or aluminum foil and allow to sit in your refrigerator overnight.

In the morning, melt the butter, then mix in the brown sugar.  Pour this evenly over the bread mixture, and then bake at 350 degrees for 30 minutes, or until the bread is golden brown on top.  You can also sprinkle more spices over the casserole before baking it for a little extra deliciousness.

Sunday, May 12

Homemade Vanilla Extract After Three Months

I took time today to strain and bottle the vanilla extract that I began "brewing" three months ago.  I was planning on doing some baking today, so I thought it would be a great opportunity to sample this new pantry staple.  When I opened the bottle, the smell was just intoxicating!  I am so excited to have a homemade extract for my baking that I bet I never go back to store-bought again.  The price of the beans and vodka are really not that great for as often as I would be making it, plus I have the added bonus of knowing just what is in my extract.  Win-win!
Since the original post showed only the brewing and storage process, I'll share my straining and bottling process with you now.  Get a container that has a reliable pour spout that won't dribble (you want to save every last delicious drop that you can--three months or more is a long time to wait for more extract), cheesecloth or coffee filter, your clean bottles or containers for the extract, a funnel, and a wet paper towel.  Cover your work surface with paper towels or something absorbent to prevent the vanilla from staining your work surface.  If it does stain, you can clean it by gently rubbing the countertop with a wet toothbrush and some baking soda (as long as you can use a mild abrasive on your counters).

Place the cheesecloth or filter over top of the container, and slowly pour the extract through to strain.  Remove the beans and set these aside for later. 
The remains of the vanilla beans.  You can see the little brown caviar specks on the side of the jar.
Using the funnel, pour the extract into the bottles.  I have 8 one-ounce bottles and 2 four-ounce bottles.  The one-ounce bottles are for gifts, if you're nice to me :) .
One 16 oz. jar yields all of this!
Using cobalt-colored or amber-colored bottles are preferred.  The colors of these bottles filter out UV light.  Clear glass is still fine to use, but I'd recommend keeping the clear bottles in a dark place.  To be honest, though, I don't know how UV light affects vanilla extract...it's just been something I've read numerous times when looking into making this stuff.  Just passin' it along to you all.
So, you have your vanilla extract all strained and in the bottles!  Good for you.  Treat yo'self with some delicious baked goodness.

Now, what to do with these leftover pieces of beans?
Vanilla sugar!

Spread the beans in a single layer on a paper towel.  I put a piece of wax paper under the paper towel and spread them out on a smaller baking sheet, but you can dry them however you wish. 
Mix one bean in per cup of sugar, and let it sit and absorb the vanilla flavor for a week or two.  The sugar should start turning light brown as the vanilla is absorbed.  Vanilla sugar just adds a little extra "oomph" to your baking.  You'll be glad you did!

Tuesday, March 5

Tomato Time!


"Then God said, “Behold, I have given you every plant yielding seed that is on the surface of all the earth, and every tree which has fruit yielding seed; it shall be food for you; and to every beast of the earth and to every bird of the sky and to every thing that moves on the earth which has life, I have given every green plant for food”; and it was so." --Genesis 1:29-30

Well, it's finally that time of year...time to start the tomato plants!  I'm in Zone 5, so tomato planting usually happens in the last half of May.  Starting them now will give them plenty of room to grow and strengthen before I start acclimating them to the outdoors.  Last year, I kept seeds from an heirloom cherry plant that I purchased at a local greenhouse with the intention of growing them into new plants this year.  My husband loved these cherry tomatoes, so I kept as many seeds as I could.  From what I have heard and read, you really only want to keep seeds from heirloom plants, because if you go to the grocery store and save the seeds from, say, a regular green pepper, and then attempt to grow a new plant from those seeds, you really won't know what might come up.  The fruits and veggies at the grocery store are most likely genetically modified in some way, and also likely a hybrid of other plants, and therefore can't be expected to grow like a normal plant in normal conditions and normal soil.  If you purchase seeds to start your own plants, and want to reuse the seeds again next year, be sure to purchase heirloom seeds or plants, as these are most likely to be untouched by modern science and fairly reliable in growth and yield each year. 

Last fall, I separated the tomato seeds from the slimy goo inside of the tomatoes and rinsed them well (by the way, I'm not a fan of eating tomatoes raw.  I'm slooowly coming around to eating chunks of tomato in food dishes.  I do, however, love tomato-based foods like ketchup and salsa!  Weird, huh?).  Then I let them air dry on the counter for several days, placed them in a resealable baggie, and stuck them in the freezer for the winter.  Now they are in their new home of warm moist dirt, near a heating register and in the sunniest window we have.  Here come the tomatoes!  I'd love to invest in a heating pad for the seeds, but we just don't have room for a little greenhouse rack right now.  I have successfully started plants like this before, though, so I'm not too concerned.  Depending on how many come up, some might even be headed to new homes in the months ahead.


It's pretty inexpensive to start seeds--much cheaper than going to the greenhouse and purchasing the plants that you want to grow.  It depends on how much you want to grow, but you might spend a total of $5-$10 to start seeds, whereas if you purchase the plants from a greenhouse, you'll spend at least twice that amount.  Granted, the work's been done for you, so to speak, and all you have to do is plant them, but starting from seeds is more fun, less expensive, and much more satisfying!  I'm only starting tomatoes inside, so I decided to make my own little greenhouse out of some old carry-out boxes that I kept specifically for that purpose.  It's much smaller and space-friendly than the larger greenhouse boxes that I have previously purchased and used.  I used peat pellets that I had on hand to start the little seeds, then I added some starter soil that I bought on clearance last fall for when they need more soil to keep growing.  Fall is a great time to stock up on clearanced items that you can use in the spring for your new planting season.
I'm going to try and get nine plants from the seeds I saved.
I have three seeds in each peat pod.  You can see them here before I covered them lightly with the dirt.
The carry-out box with the warm, wet pods inside.  You can see the condensation on the inside.  I only snapped one side closed, to allow for slight air circulation.  I'll mist the plants every day or two to keep them wet.
Here's an update on my homemade vanilla extract.  You can see how dark and rich-looking it is now.  It's been three weeks since I submerged the beans in the alcohol, and the scent is intoxicating!  A strong, rich, sweet, yet alcoholic smell that will continue to steep for another five weeks before I taste it, but I'm already very excited.  Oh, the cookies I will make!  If you didn't see the original post with instructions on how I am making my extract, click here: Makin' Homemade Vanilla Extract.

Sunday, February 10

Makin' Homemade Vanilla Extract

I am so excited!!  I am stepping out into new territory today--out of the realm of store-bought vanilla extract and into the fragrant world of homemade vanilla extract.  I've been doing a lot of research, and it just seemed like a really neat thing to try.  After poring over pages across the vast Internet plane, I found a great website with a lot of information about different types of beans, and based on that information, I chose three different kinds that I will be using in my vanilla extract: Madagascar, which is the most common bean, described as having "a sweet, buttery aroma", Indian, "bold, dark, tones of smoke and chocolate", and Bourbon, "smooth and creamy, excellent for ice cream, gelato and warm drinks".  Can you imagine all of those qualities floating around and melding together in a bottle over several months?  Soon, they will be like liquid gold in my pantry cabinet.  Now can you see why I'm excited?  This is going to make all of my baked goods go from yummy to OH MY GOSH YOU MADE THAT??  THAT'S LIKE HEAVEN IN MY MOUTH!!  At least, that's what I imagine will be the reaction to every cake, cookie, brownie, and candy that I make for the rest of my life.  They will hail me as queen of the baking world, and somewhere, a statue will be erected in my honor of a giant vanilla bean, because of the awesomeness of my homemade vanilla extract.  Ha, and that's just a little peek into the world in my head :).

So, you are probably wondering, "How does one make a concoction of vanilla extract?"  I thought you'd never ask!  Let's get started.

Here is what you need:
  •  8 oz. vodka--doesn't have to be really high quality, but honestly, the higher quality ingredients that are used, the better quality of the finished product.  It should be at least 35% alcohol (40% is better, and common for vodka).  Don't use a higher concentration than 40% alcohol.  You want a vodka that has no flavor or odor.  Bourbon and rum can also be used, but it will add additional flavor to the vanilla extract.
  • Minimum of five Grade B vanilla beans (here is where you can mix flavors to make it the best!).  You can use the higher priced top-grade beans, but the B grade are sold specifically for making extract.  They don't look as good as the top-grade beans, but are of the same flavor quality.
  • A 10-12 oz. size bottle or jar for soaking your beans and vodka, with a tight-fitting lid.
  • A cool, dark place.
  • Time.  Lots and lots of time.
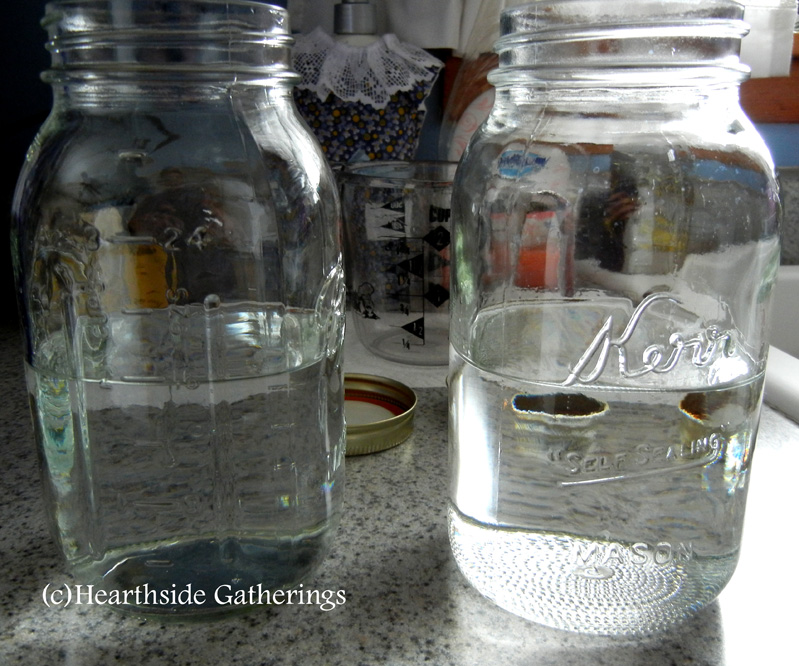
I'm going to make four 8 oz. batches of vanilla in two full-sized canning jars.  I plan to use the same mixture of full vanilla beans in each batch, and divide up the extra vanilla beans evenly and then add the pieces to the jars.

Here's what you do:
First, successfully locate the vodka.  My husband and I found out that the local grocery stores only carry diluted vodka, 21% alcohol.  That just wouldn't do.  So we drove around town trying to find a real liquor store (we haven't ever needed a liquor store here...we can usually get whatever adult beverages we wanted at the grocery stores.  This was a memory exercise more than anything!).  Once you find your vodka, you'll want to measure it out and pour it in a clean container.  Make sure that the container is big enough to submerge your beans completely.  If they are out of the liquid, the exposed part will dry out.

With a sharp paring knife, split the bean pod down the middle, but don't cut through the other side.  You just want to expose the beans and insides to the liquid.  Some people suggest scraping out the stuff inside of the pod, then chopping everything up and putting it in the alcohol, but it seems unnecessary-really, the beans will soak for so long that the liquid will thoroughly penetrate the bean, and the flavor will be extracted regardless.  You can cut the beans to fit and stay submerged in the jar, though, which is why I cut my beans in half.
15 Madagascar B-grade beans.  They are dried more than top-grade beans, but you get the same effect with vanilla extract using these beans.
The fine, delicious, fragrant insides of the pods.
These are the Indian vanilla beans--notice the difference in appearance between these and the B-grade beans.
And these are the Bourbon vanilla beans...they were by far the plumpest beans of the three I purchased.  They had a tacky, almost licorice-type feel to them when I took them from the package.
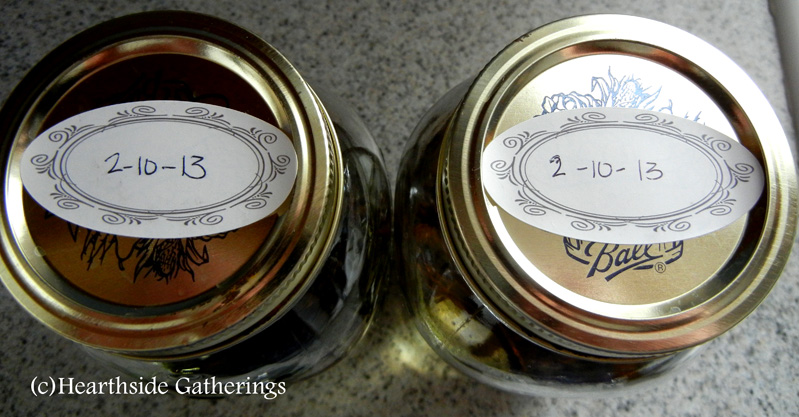
Once you've split the beans, place them into the liquor--again, making sure that the beans are completely submerged--and shake the jar a bit.  Now, set the jar in a cool, dark place and let it sit!  Shake it once a week.  Feel free to smell it every now and again.  The extract should sit and steep for at least six weeks.  Some sites recommend letting it sit for six months!  I'd say that six months is extreme, but six weeks is too short.  I'm going to let my jars sit for at least two months, and then test.  I'm also labeling the jars with the date that I made them, so that I have a reference.
Action shot!
These are food-grade sticker labels that can be found with canning supplies at the store.  They wash off very easily.
You can see that the liquid is already starting to change color as the flavor is being extracted!
After you have let your beans sit for months, use a strainer lined with several layers of cheesecloth and strain the liquid.  Do this until you no longer see bits of the beans in the extract (I will drain the strained extract into a clear pitcher, so that I can see the bits).  If you are just keeping it for yourself, you can put it in whatever container you have, though I wouldn't recommend plastic, as certain plastics can leech a plastic-y flavor into your extract.  If you use clear jars/containers, store it in a dark place.  If you purchase cobalt or brown glass bottles, which is what I'll do, you don't have to worry about keeping it in a dark place, because the cobalt and brown bottles will filter out UV light.  I plan to keep some for myself and give some away as gifts, and I will be purchasing the cobalt bottles.  The extract will last indefinitely--a bonus effect of the alcohol.

If you're like me, you wonder a lot about random topics.  In my researching ways to make homemade vanilla extract, I couldn't help but wonder when someone realized that they could extract the flavor of the vanilla from these beans.  Because they are not native to our part of the world, it meant that shipping merchants must have introduced them to us here in the states, but when?  I know that in our cooking at the living history farm, we use rose water for flavoring, and rose water is commonly specified in many mid-19th century recipe that I've seen.  So when was the U.S. introduced to this nectar?  According to the Southborough Historical Society website, in Southbourough, Massachusetts, a chemist/druggist named Joseph Burnett actually created the extract in the 1840s for a woman who had lived in Paris before moving back to the States.  Chefs had used it there, but not in a precise way, to get the vanilla flavor in some of their dishes.  Here is the information quoted from the historical society's webpage:

“In 1847 a [prominent] lady [wife of a wealthy Boston manufacturer] who had lived some years in France, entered the store of Joseph Burnett, the Boston chemist.  She said she was very anxious to procure a vanilla flavor for her creams, sauces and desserts, such as she had been getting in Paris. 

At that time the only extract of any kind in this country for flavoring purposes was a cheap extract of lemon.  A few French chefs used the vanilla bean itself.  This was the clumsy, unsanitary and inconvenient way these chefs got their vanilla flavoring; they would purchase one or two vanilla beans, cut them up and put them in a linen bag, ready to use like a tea ball, to flavor whatever was required.  The results from this tedious, inexact method of extracting the flavor were of course very unsatisfactory.  When the bag was first used it would give the delicious flavor of pure vanilla, but afterwards, when it became diluted, the taste was weak and unpalatable. It was never uniform in strength or flavor.  It was always expensive because the full rich flavor could never be thoroughly extracted.

Mr. Burnett listened to the lady's description of the flavoring she wanted.  This extraordinary request challenged Mr. Burnett’s resourcefulness.  A man ahead of his time, he believed in supplying what his customers needed, if he could.  He busied himself in his laboratory.  He [went to New York] and bought a pound of the very best vanilla beans he could procure [for $3.50] and extracted the rare, delicate flavor of which she spoke, and after long, careful experiments, when he was satisfied with its quality, he made the first Vanilla Extract that was ever sold in this country.  The lady was so pleased she urged him to make more, promising to take her supplies of it from him and to introduce it to her aristocratic friends.  This was the beginning of Vanilla and other extracts in this country.”

To read the full story, here is the page link: Southbourough Historical Society

There.  Now you can go on Jeopardy! and win the final question.  I always feel smart when I can answer the Final Jeopardy! question.

Here is the post for straining and bottling the extract after it's been steeping for a few months: Vanilla Extract After Three Months.

I'm not endorsing or being sponsored by anyone to do this post.  That being said, here is the store that I purchased my beans from: Beanilla.com .  You don't have to buy from them--you can find vanilla beans online at several places, like Amazon, Rose Mountain Herbs, and Amadeus Vanilla Beans.  Same thing with the bottles.  Do some shopping online and find out what best fits your needs.  Then order your beans and make yo'self some homemade vanilla goodness!

ShareThis